As an Amazon Associate I earn from qualifying purchases. This post may contain affiliate links.
This sourdough ciabatta is an Italian white bread with a thin, crispy crust and large, irregular holes, called an open crumb. It’s a high hydration dough made with active starter, flour, water, and olive oil. The perfect Italian sandwich bread for paninis!

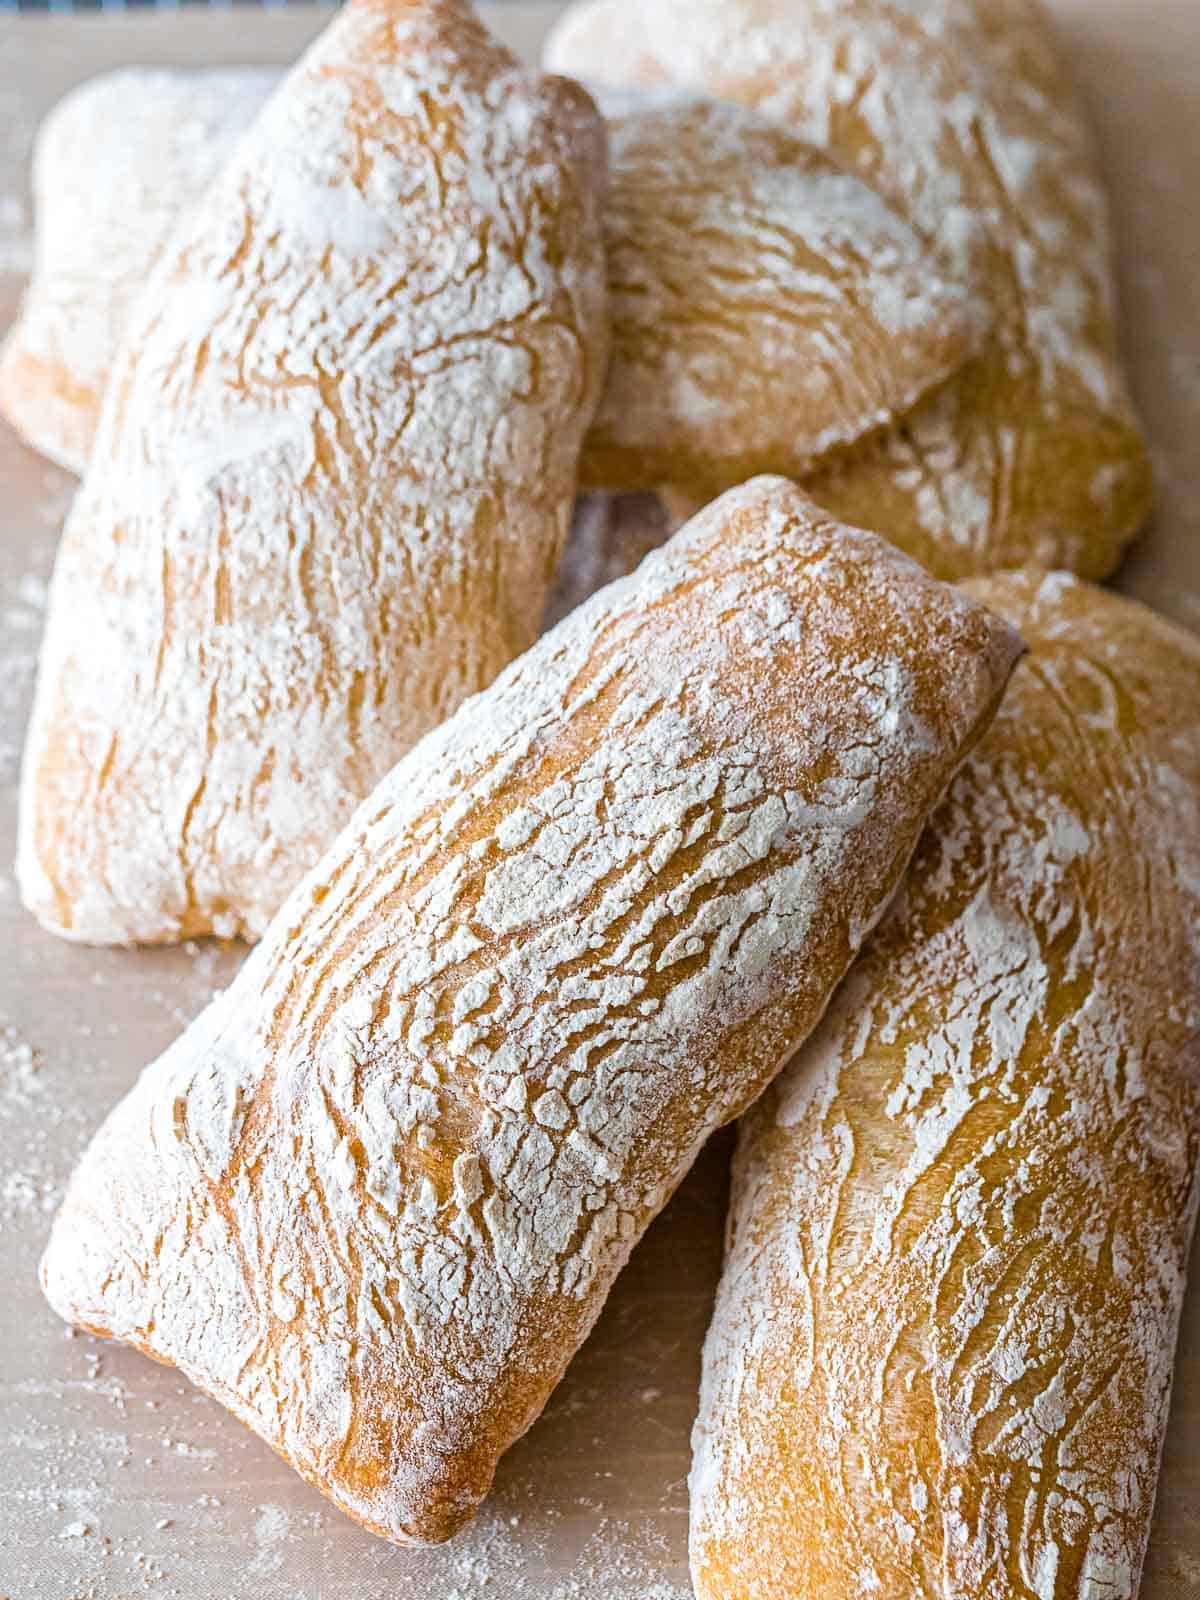
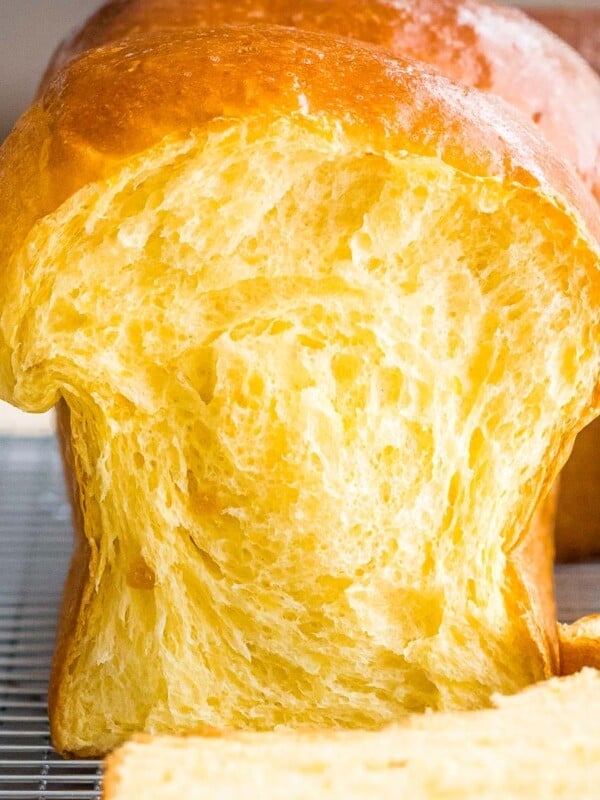
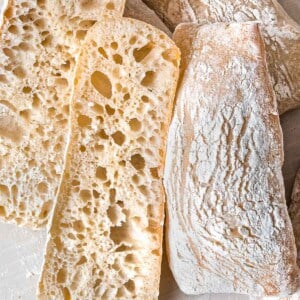
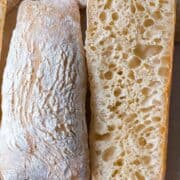
This sourdough ciabatta has a soft, open crumb with large, irregular holes that’s great for absorbing sauces and spreads. The crust is thin, crackly, and crispy which adds a wonderful texture that contrasts with the chewy interior.
For these reasons, sourdough ciabatta is one of my favorite Italian breads to make using sourdough starter. It’s an excellent sandwich bread for all sorts of sandwiches, but I love using it for homemade paninis.
Expert Tips: Sourdough Ciabatta
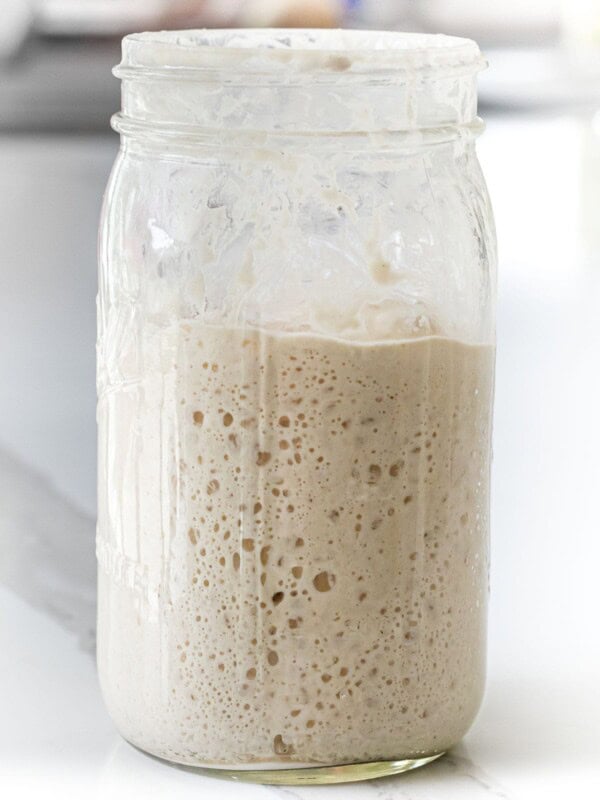
- Sourdough starter – Use when it’s most active; 100% hydration and fed the night before. Look for doubling in volume and make sure there are no signs of it receding. You should be able to tell by looking at the sides.
- Poolish – Use when it’s most active. This is the pre-ferment; Make 10 to 14 hours ahead of baking depending on ambient temperature.
- Handle gently – This is a high hydration dough which is required for an open crumb. Handle gently and avoid deflating it during stretching & shaping.
- Use a scale – always use a scale when baking bread. Baking needs to be exact so using a digital scale is a must. I prefer using this digital scale with baker’s percentage (affiliate link).
- Proofing container – use a clear container for proofing, preferably with measurements on the side to easily tell when your dough is ready for the next step.
Ingredients
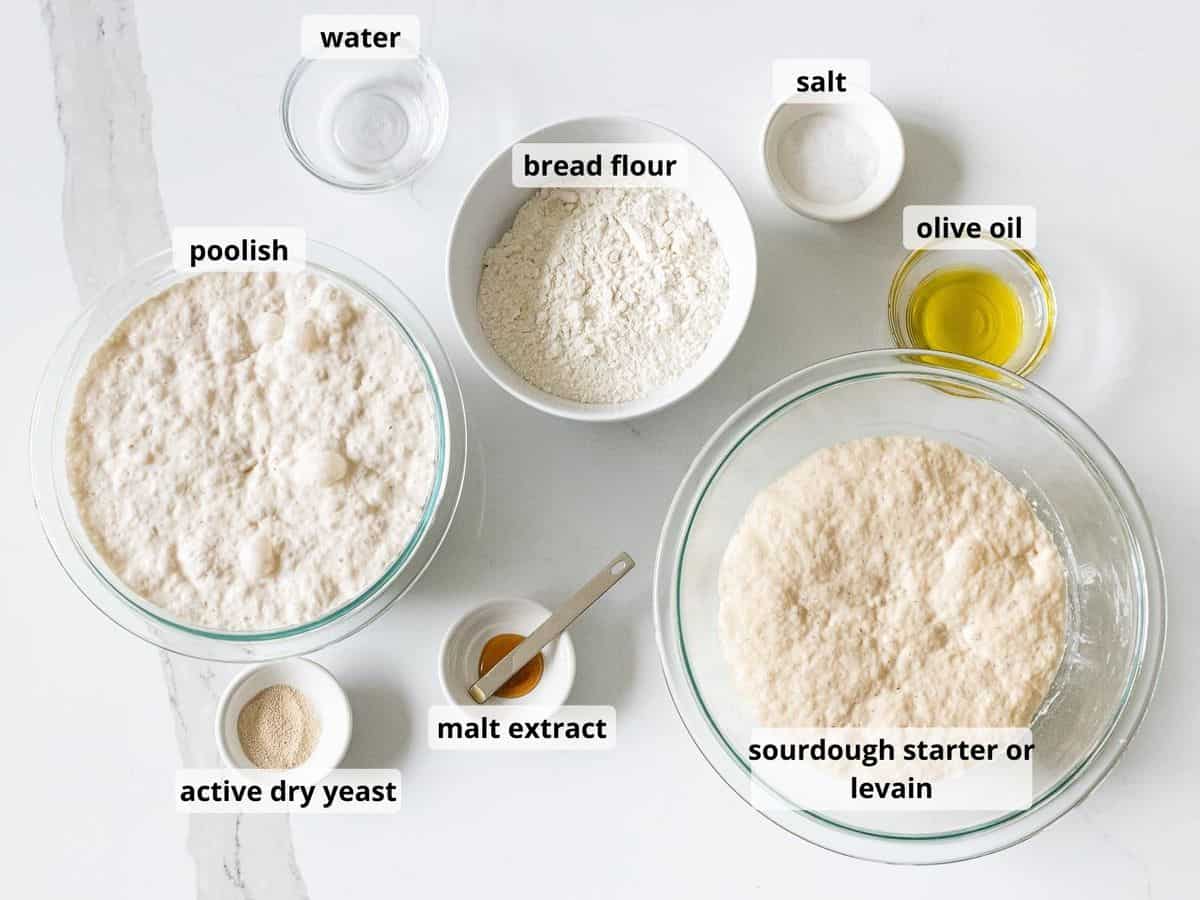
- Sourdough starter – Use when it’s most active. It should be doubled in size at least when it’s time to bake.
- Poolish – Poolish is a pre-ferment that’s used to improve the flavor and texture of any baked good. It’s a high hydration pre-ferment which contributes to the large, irregular holes commonly found in ciabatta. This is referred to having an ‘open crumb.’
- Malt extract – This adds moisture and acts as a yeast nutrient in the ciabatta dough.
- Olive oil – Use extra virgin olive oil for more flavor.
How to Make Sourdough Ciabatta
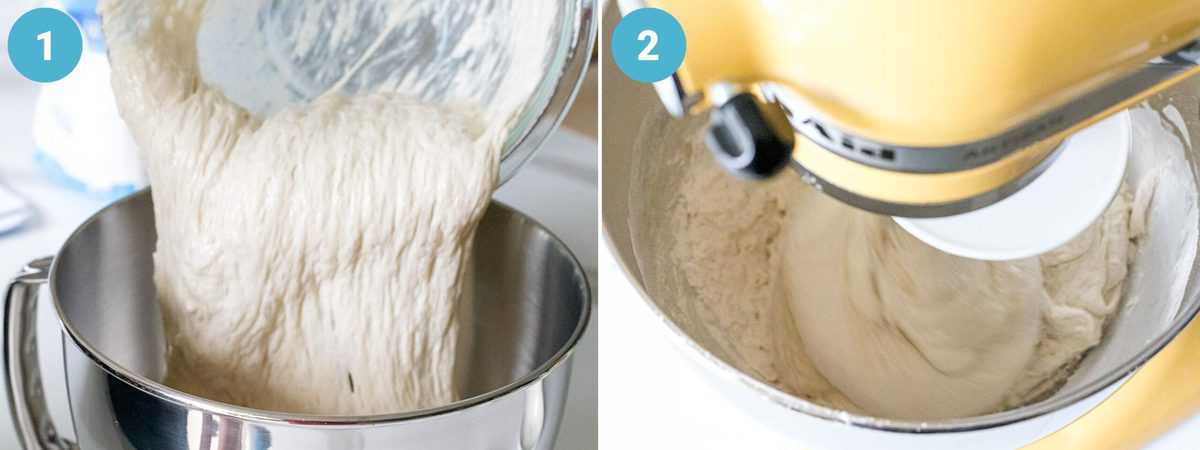
- Combine: Add all the ingredients to a large mixing. Make sure the salt and yeast don’t touch.
- Mix: Using a dough hook attachment, mix on low at first until all the dry flour is combined with the dough. Then increase to high speed.
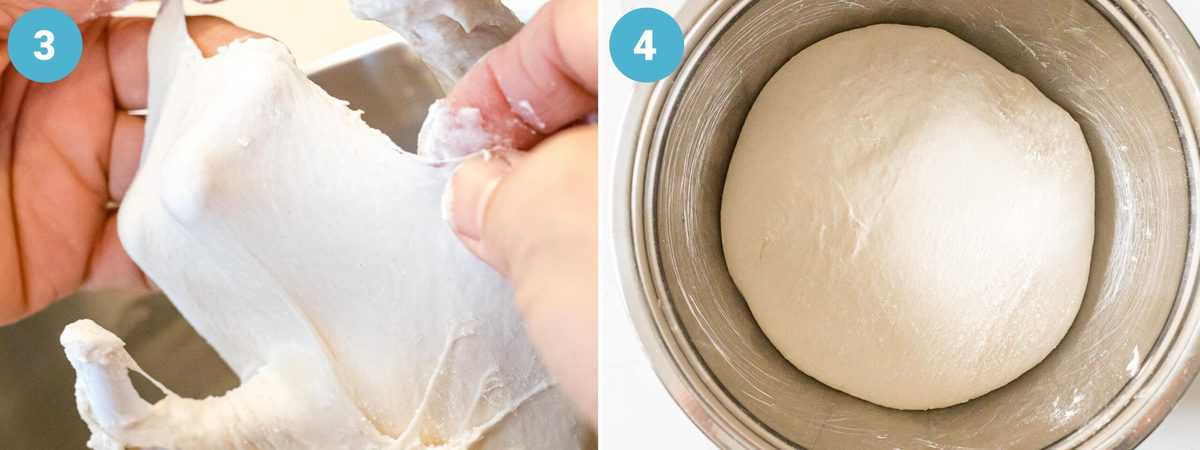
- Windowpane test: Once the dough forms into a ball and completely pulls away from the sides, check for gluten development by taking a small piece of dough and stretching it between your fingers. You should be able to stretch it thin enough to be translucent to see your fingers through it without it tearing.
- Bulk fermentation: Add the dough in a container and form it into a ball with a smooth surface. Proof for 30 minutes, punch it down and proof again until doubled in size.
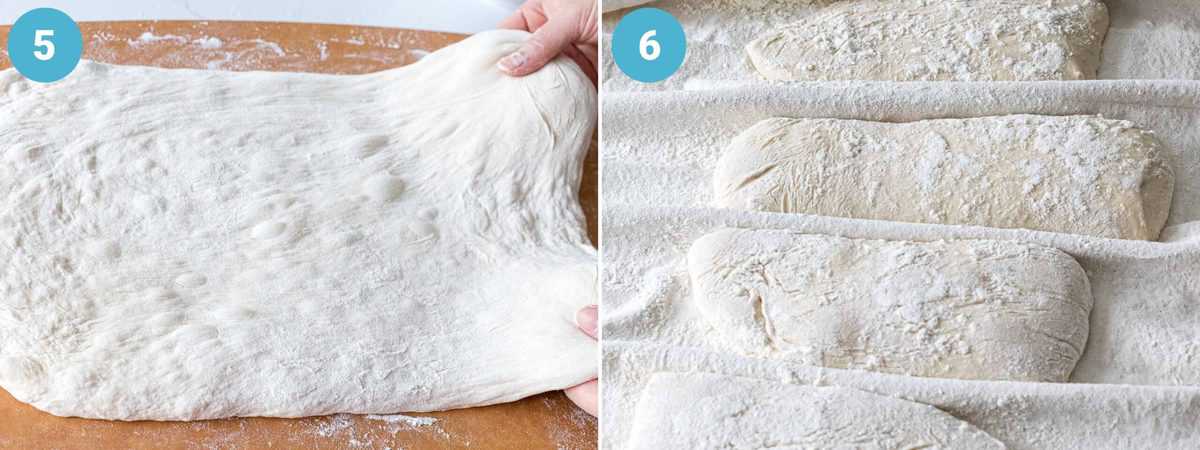
- Bench Rest: Transfer the dough on a well floured surface and gently stretch it by hand by pulling the corners and sides into a rectangular shape about 1 inch thick. Do not use a rolling pin as it will deflate the dough. Let it bench rest for 10 minutes.
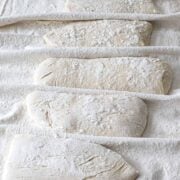
- Shape and final fermentation: Divide the dough into 6 even pieces and lay them surface side down on a well floured proofing cloth. Proof until doubled in size.
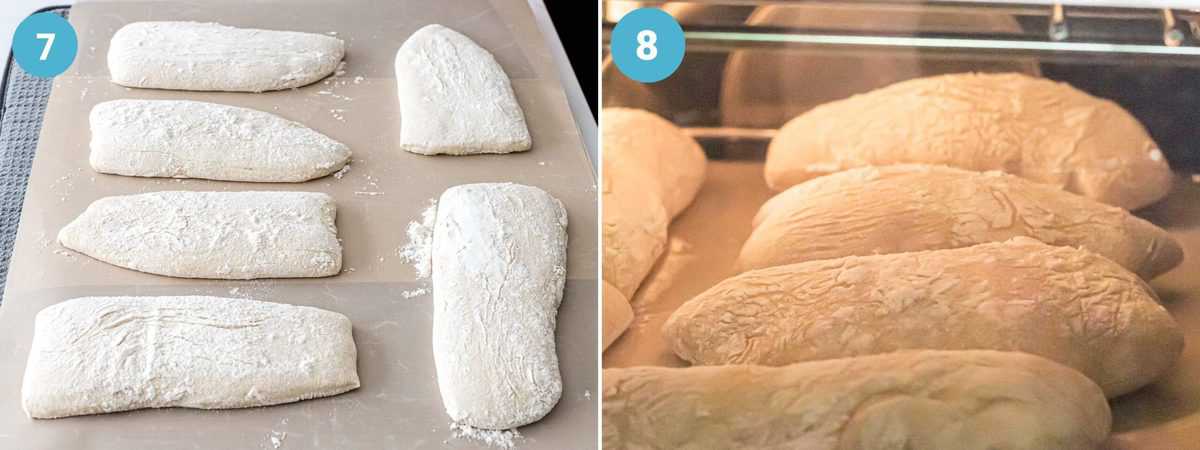
- Flip the pieces over so it’s surface side up and place them on a heat safe baking mat. Use a large, flat cookie sheet to transfer the baking mat directly onto the oven rack.
- Before closing the oven door, add 1/3 cup of water to the oven to create steam. See the recipe card for more details. Bake at 356 degrees F for 15 minutes.
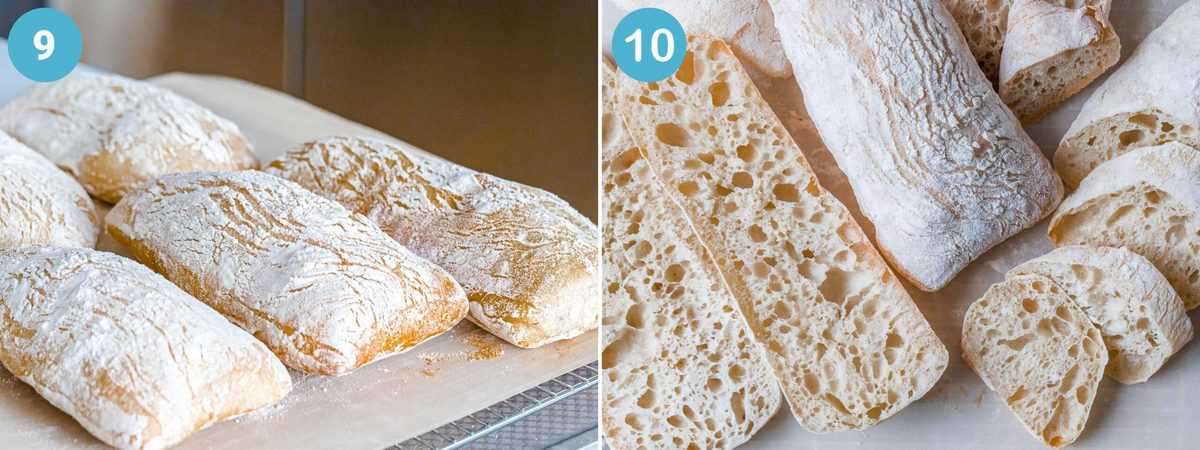
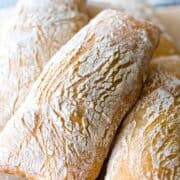
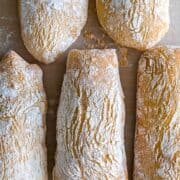
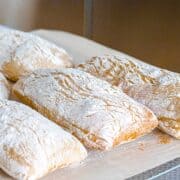
- The baked ciabatta should have a thin, crispy crust with large irregular holes. You should see a cracked flour crust caused by expansion of the dough.
- Cut open once it reaches room temperature and use for ciabatta sandwiches, paninis, dips, or crostini.
Ciabatta FAQs
Ciabatta is an Italian white bread that literally translates to “slipper” in Italian because of its flat, broad shape. It was created in 1982 in Italy and has different variations depending on the region.
Ciabatta is made with a high hydration dough that’s made from flour, water, yeast, olive oil, and salt. This version uses sourdough starter and poolish for better flavor and texture.
Sourdough bread usually has a very pronounced sour flavor whereas ciabatta has a pleasant, subtle wheat flavor with large, irregular holes.
Though we’re using sourdough starter in this recipe, sourdough ciabatta shouldn’t taste overly sour. The starter merely adds to its flavor, texture, and moisture level.
Bread flour is best when making ciabatta. It’s great for gluten development and creating a nice open crumb with large holes for absorbing sauces and spreads when making sandwiches.
Yes, ciabatta is naturally dairy free and egg free.
Poolish is a pre-ferment that’s used to improve the flavor and texture of any baked good. It’s a high hydration pre-ferment which contributes to the large, irregular holes commonly found in ciabatta. This is referred to having an ‘open crumb.’
It’s a sticky, slightly sweet syrup made from malted barley which adds moisture and acts as a yeast nutrient in the ciabatta dough.
More recipes:
Sourdough Recipes
Soft Pumpkin Sourdough Bread
Sourdough Recipes
Sourdough Starter 2 Ways – Traditional and No-discard method
Sourdough Recipes
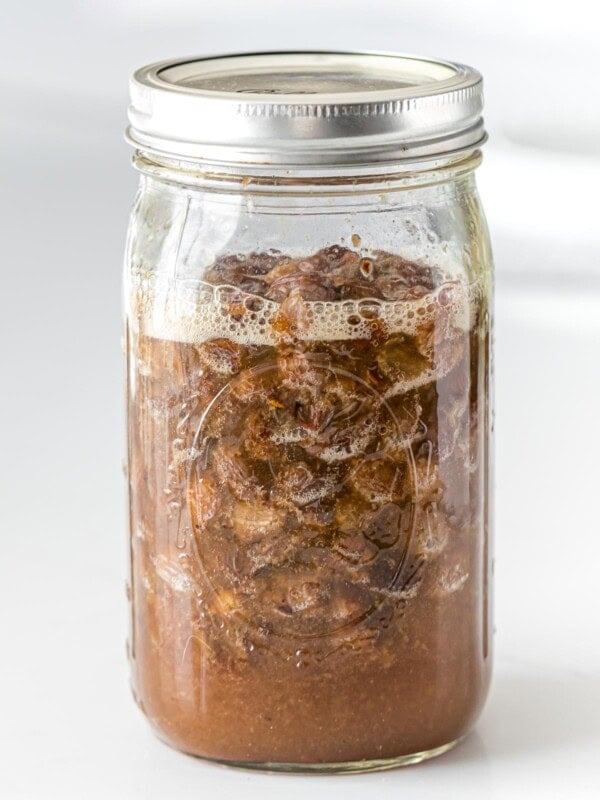
How to Make Yeast Water with Fruit
Sourdough Recipes
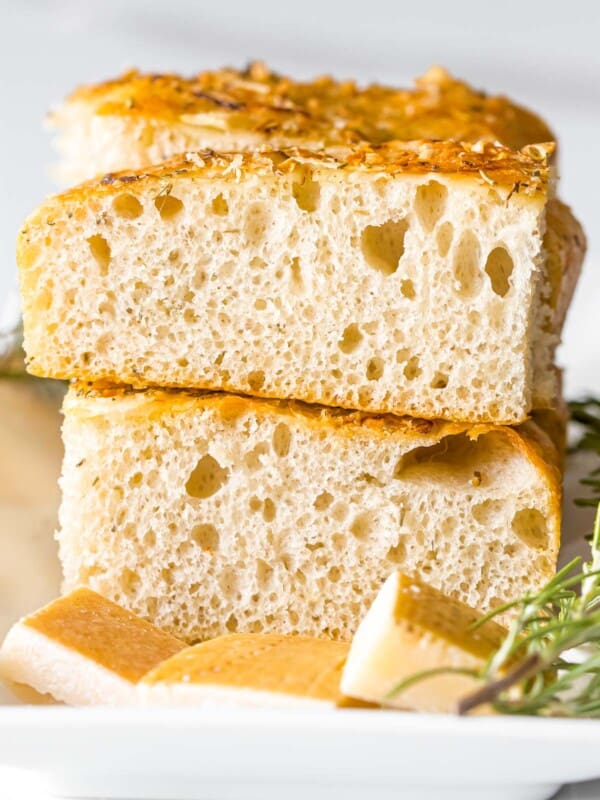
Sourdough Focaccia with Rosemary and Parmesan
Sourdough Ciabatta
Ingredients
Wet Ingredients
- 75 g sourdough starter or levain, 100% hydration; use when most active
- 15 g olive oil
- 5 g water
- 3 g barley malt syrup
- 652 g Poolish, see Note 1
Poolish Ingredients
- 325 g bread flour
- 325 g water
- 0.8 g active dry yeast, about ⅓ teaspoon
Dry Ingredients
- 175 g bread flour
- 8 g sea salt
- 2 g active dry yeast, about ¾ teaspoon
Instructions
Prepare the poolish
- Make Poolish: About 12 hours prior to baking, add all the ingredients for the poolish in a large bowl or container and mix together well.Cover with plastic wrap and let sit out at room temperature. When ready, there should be large bubbles at the surface and there should be no sign of receding (deflating). Check the side of the container for any mark of recession. (See Note 1)
Mix
- Mix: Add all the wet and dry ingredients (including the poolish) to a large mixing bowl attached to a stand mixer. Make sure the salt is not in contact with the active dry yeast. Using a dough hook, mix on low speed until the dry flour has been fully incorporated. Then increase to speed to high. The dough should form into a smooth ball with very little sticking to the sides of the bowl. Scrape the dough from the bowl and hook once or twice. After about 6 to 10 minutes, the surface should be smooth and have a slight sheen.
- Windowpane Test: Stop your mixer and sprinkle a bit of flour on a small section of the dough. Stretch that section of dough between your fingers to check for gluten development. It should pass the 'windowpane' test, which means you're able to stretch the dough until it's thin and translucent enough to see your fingers through it.
Proof and Shape
- Bulk Fermentation: Transfer the dough to a large see through container (See Note 2). Shape the dough into a round ball by tucking the sides in, ensuring the surface is smooth as that will be the exterior of the bread. Cover with plastic wrap. Transfer to a warm and humid proofing box for 30 minutes (see Note 3). Punch it down, then proof until it's doubled in size. You should see air bubbles forming all the way to the surface of the dough.
- Bench Rest: Transfer the dough on a well floured surface. Be sure to preserve the smooth surface of the dough and keep it facing up. Gently stretch it by hand by pulling the corners and sides into a rectangular shape about 1 inch thick, taking care not to deflate the dough. Do not use a rolling pin as that will deflate the dough. Let it bench rest for 10 minutes.
- Shape: Cut into 6 even pieces using a bench scraper. Flip them over and lay them surface side down on a well floured proofing cloth. Pinch the proofing cloth in between the dough to create a border and lightly cover with the cloth.
- Final Fermentation: Let the dough proof at room temperature or until almost doubled in size.
- Preheat: Preheat the oven to 356°F and place the rack in the center of the oven. Place a baking sheet with at least 1 inch high sides on the bottom shelf. This will be used to create that initial burst of steam required for oven spring.
Bake
- Bake: Flip the dough over so it's surface side up and transfer them to heat proof baking mat. Place the baking mat directly on the middle rack of the oven. See Note 4. Carefully pour ⅓ cup of water onto the baking sheet to create steam and quickly shut the oven door. Wear oven mitts to avoid steam burns. See Note 5. Bake for 15 minutes at 356°F.
Notes
- Poolish: I usually make my poolish 12 hours before using it. This is based on my experience with the ambient temperature of my kitchen, which hovers around 74 degrees F. You may need to adjust your times based on how cool or warm it is. You can speed this up or slow it down by changing the surrounding temperature.
- Transfer the dough: To make the transfer easier, sprinkle a bit of flour around the sides of the bowl and use a flexible bowl scraper to transfer the dough.
- Proofing box: If you don’t have a proofer, you can leave the dough covered in a warm, humid place out of direct sunlight. Some suggestions:
- Use an oven: Place the dough on the top rack of your oven and place an empty pan on the bottom rack. Pour boiling water halfway up the pan on the bottom rack and keep the oven door closed. This will create enough heat and humidity to proof the dough. You can also leave the oven light on if you need more heat.
- Use an insulated cooler or icebox: Add about 1 or 2 inches of hot water to an insulated cooler and place the dough inside on top of a container to keep it away from direct contact with the hot water. This will create a warm, moist environment similar to a proofer. This is my preferred way to proof bread at home.
- Transfer to oven rack: Use a large, flat baking sheet to transfer the baking sheet directly onto the oven rack. Use a quick, swift motion to push the baking mat onto the oven rack and quickly pull the baking sheet away. The baking mat I recommend allows for air flow which helps create a crispy crust. This is why I bake it directly on the oven rack.
- Adding Steam: Avoid letting the water touch any glass or stoneware as it can shatter those materials. Use an oven mitt when pouring the water as it can cause steam burns.
- Why add steam when baking? The steam helps develop oven spring, which refers to that initial burst in volume during the first 10 minutes of baking. It prevents a hard crust from forming prematurely which allows the bread to continue expanding to form an open crumb full of large holes with a crispy thin, crackly crust.
Nutrition
Nutrition information is automatically calculated, so should only be used as an approximation.
Like this? Leave a comment below!

I love ciabatta to mop up the sauces. I am new to the sourdough for baking breads, so this recipe is very detailed and helps me.
The flavor and crumb was delicious! I’ve never had ciabatta this good, it’s really the best!
This bread was perfect for ciabatta sandwiches! This is definitely my favorite bread!
I have actually never made bread from scratch at home before, but your ciabatta looks so amazing you have inspired me to give it a try! We are making paninis tomorrow night and this bread would be perfect for it!
My husband has been really into sourdough and I can’t wait to make ciabatta with it! YUM!!
This bread recipe looks great! I am so inspired to make this recipe.
I wish I can be half as successful as you to make these amazing sourdough ciabatta. Absolutely love the crumbs and it cannot get any better than this. I am going to follow your post to give making sourdough starter a try as well.
I love sourdough and I love ciabatta. A recipe that combines the two? Genius! This is so much more of a gut healthy way to enjoy ciabatta and the crumb is perfect!
Ahhhhhhh you’re speaking my dough language! I love sourdough and ciabatta! Yours looks absolutely amazing! This as a panini would be EPIC! Thank you so much for sharing!
I love homemade breads and this ciabatta looks amazing. Thanks for a wonderful recipe. I think this bread would be perfect with a lovely bowl of homemade soup.
By a serendipitous blog search I found out about yeast water. I next found your site and then the recipe for this Ciabatta. I love Ciabatta. I made the yeast water. It was ready in about 2 1/2 days (in AZ), made the sourdough and poolish and yesterday made the Ciabatta. I am not writing out your recipes on my blog (A Harmony of Flavors), but wanted to let you know I linked your recipes in my blog. Thank you so much! I LOVE the ease of Yeast Water, The Ciabatta is fabulous.
I love baking bread and homemade ciabatta is irresistible. Yes, it takes time and patience but the result is truly delicious. We made sandwiches and were so good.
Thanks Silvia! I agree, it’s definitely worth the wait.
I am a total bread lover. I don’t make bread at home often but was looking for an easy-to-make and bake recipe. This sourdough ciabatta was just what I was looking for. Came out wonderful.
Hands down the best bread I had ever eaten (and made!)
I feel this recipe was such a success thanks to the fantastic tips and tricks you shared throughout the post and recipe. I especially appreciated learning about the Windowpane Test. We served this bread with a big bowl of soup, and there is none left – will be making it again this week.
Thanks Alex! So glad it came out great for you. Yes the windowpane test is crucial for baking any kind of bread. 🙂
I’ve never made sourdough from scratch before but this ciabatta looks so good you’ve inspired me to give it a try! Can’t wait to make this recipe this week!
Homemade bread is the best. This ciabatta looks light and fluffy and definitely delicious to eat. Can’t wait to check this out.
This recipe is really helpful and easy to make! Thank a bunch for sharing your idea! Now I can make this recipe for my fam! Loved it!
This bread looks amazing! Thank you for the step by step process for making it.
I’m so excited to make this! So many sandwich ideas and recipes I can make this recipe! My family is going to love this! Making this sourdough ciabatta with my daughter.
Homemade bread is the best! This is a winner!