As an Amazon Associate I earn from qualifying purchases. This post may contain affiliate links.
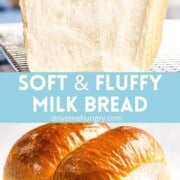
Try our recipe for the best milk bread with the softest, fluffiest crumb! This is also known as Japanese milk bread, Hokkaido milk bread, Korean milk bread (우유식빵), Chinese milk bread, or shokupan.
If you’re looking for the best homemade milk bread with the fluffiest, softest crumb, look no further! This recipe is from my mom, a retired pastry chef, that’s been adapted for the home baker. You’ll end up with professional bakery results from this simple, easy recipe for milk bread!
What is milk bread?
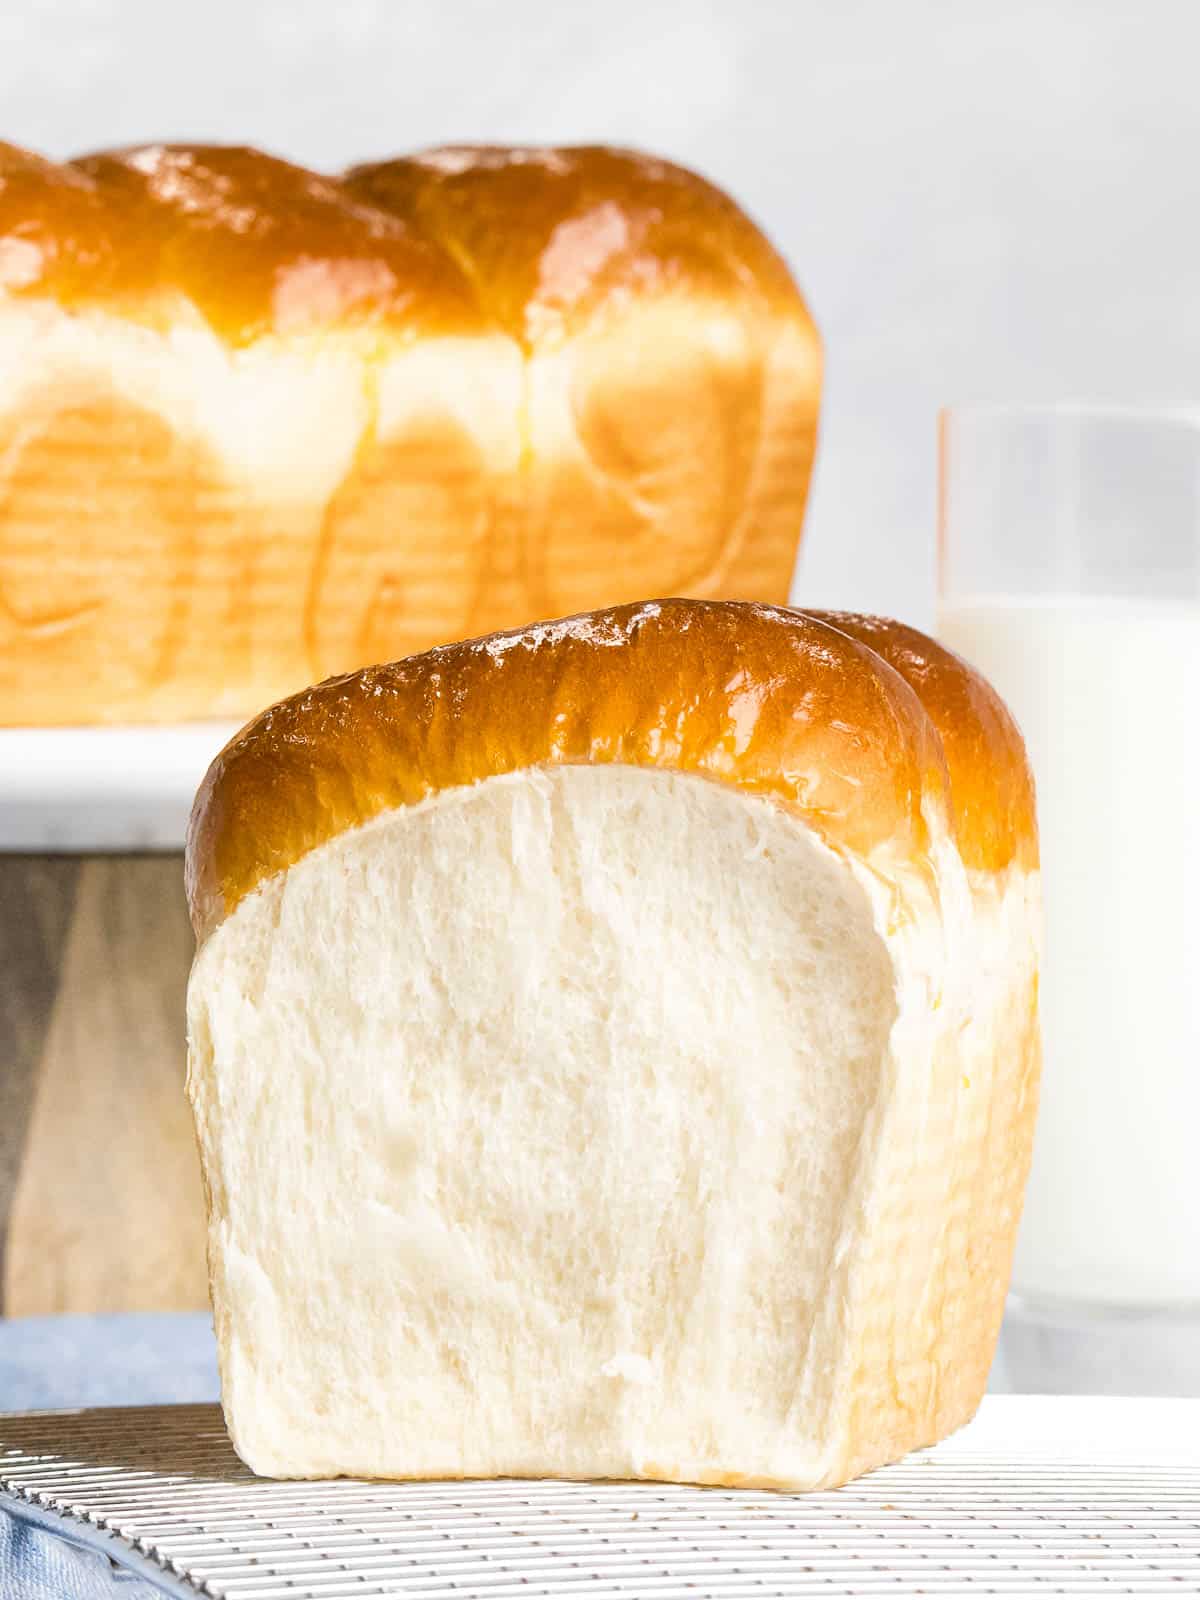
Milk bread is an incredibly soft, fluffy, light white bread made with milk that’s perfect for toast, sandwiches, or simple enjoying by itself. It goes by many names and is also known as Japanese milk bread, shokupan, Korean milk bread (우유식빵), Chinese milk bread, or Hokkaido milk bread.
Japanese milk bread is also called ‘shokupan’ in Japan, which is translates to ‘eating bread’ because it can be eaten every day as a simple, white bread. Hokkaido milk bread is made from milk from Hokkaido, which is known for their high quality milk and dairy products.
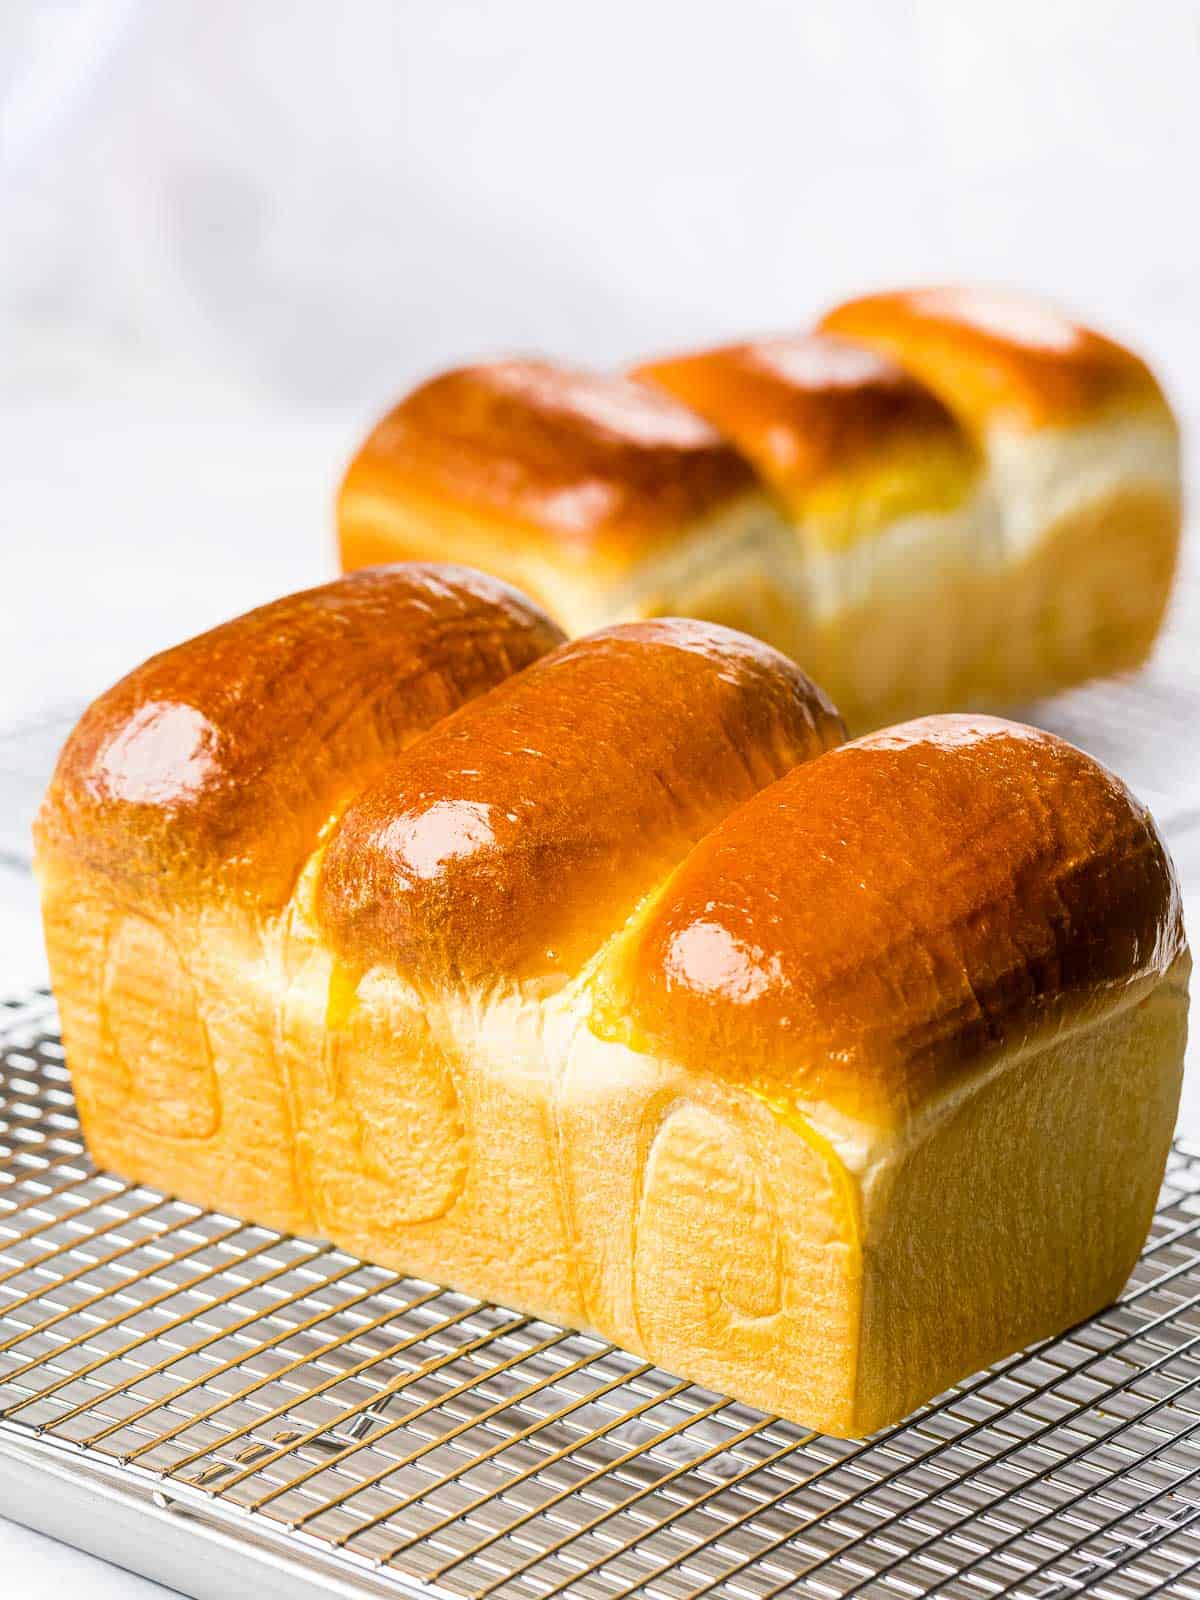
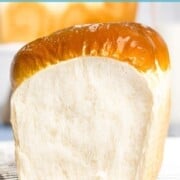
They’re sold in most Asian bakeries such as 85° Bakery, Tous Les Jours, and Paris Baguette. They can be baked in open loaf pans to reveal a golden, brown crust or baked in pullman loaf pans for a rectangular shape that’s great for sandwiches.
Asian milk bread is traditionally made using ‘tangzhong’ or ‘yuddane’ which is a roux or starter made by heating water and flour together. But my mom let me in on a baker’s secret for the fluffiest, softest milk bread which is using dough enhancer!
Dough enhancer is what professional bakers use to get soft, light, fluffy breads that stay fresh for longer periods. It’s also called dough conditioner or dough improver, and there are different benefits depending on what ingredients are added.
Tangzhong vs Dough Enhancer
While both tangzhong and dough enhancer can achieve soft and fluffy milk bread, dough enhancer is used and preferred by professional bakers because of it’s far more consistent and reliable than using tangzhong.
The type of flour, level of humidity, and duration of cooking time are all variables to control when making tangzhong, which can make it difficult for the home baker. On the other hand, dough enhancer is specially formulated and the amount added is based on the weight of flour which makes it easy to calculate for the home baker.
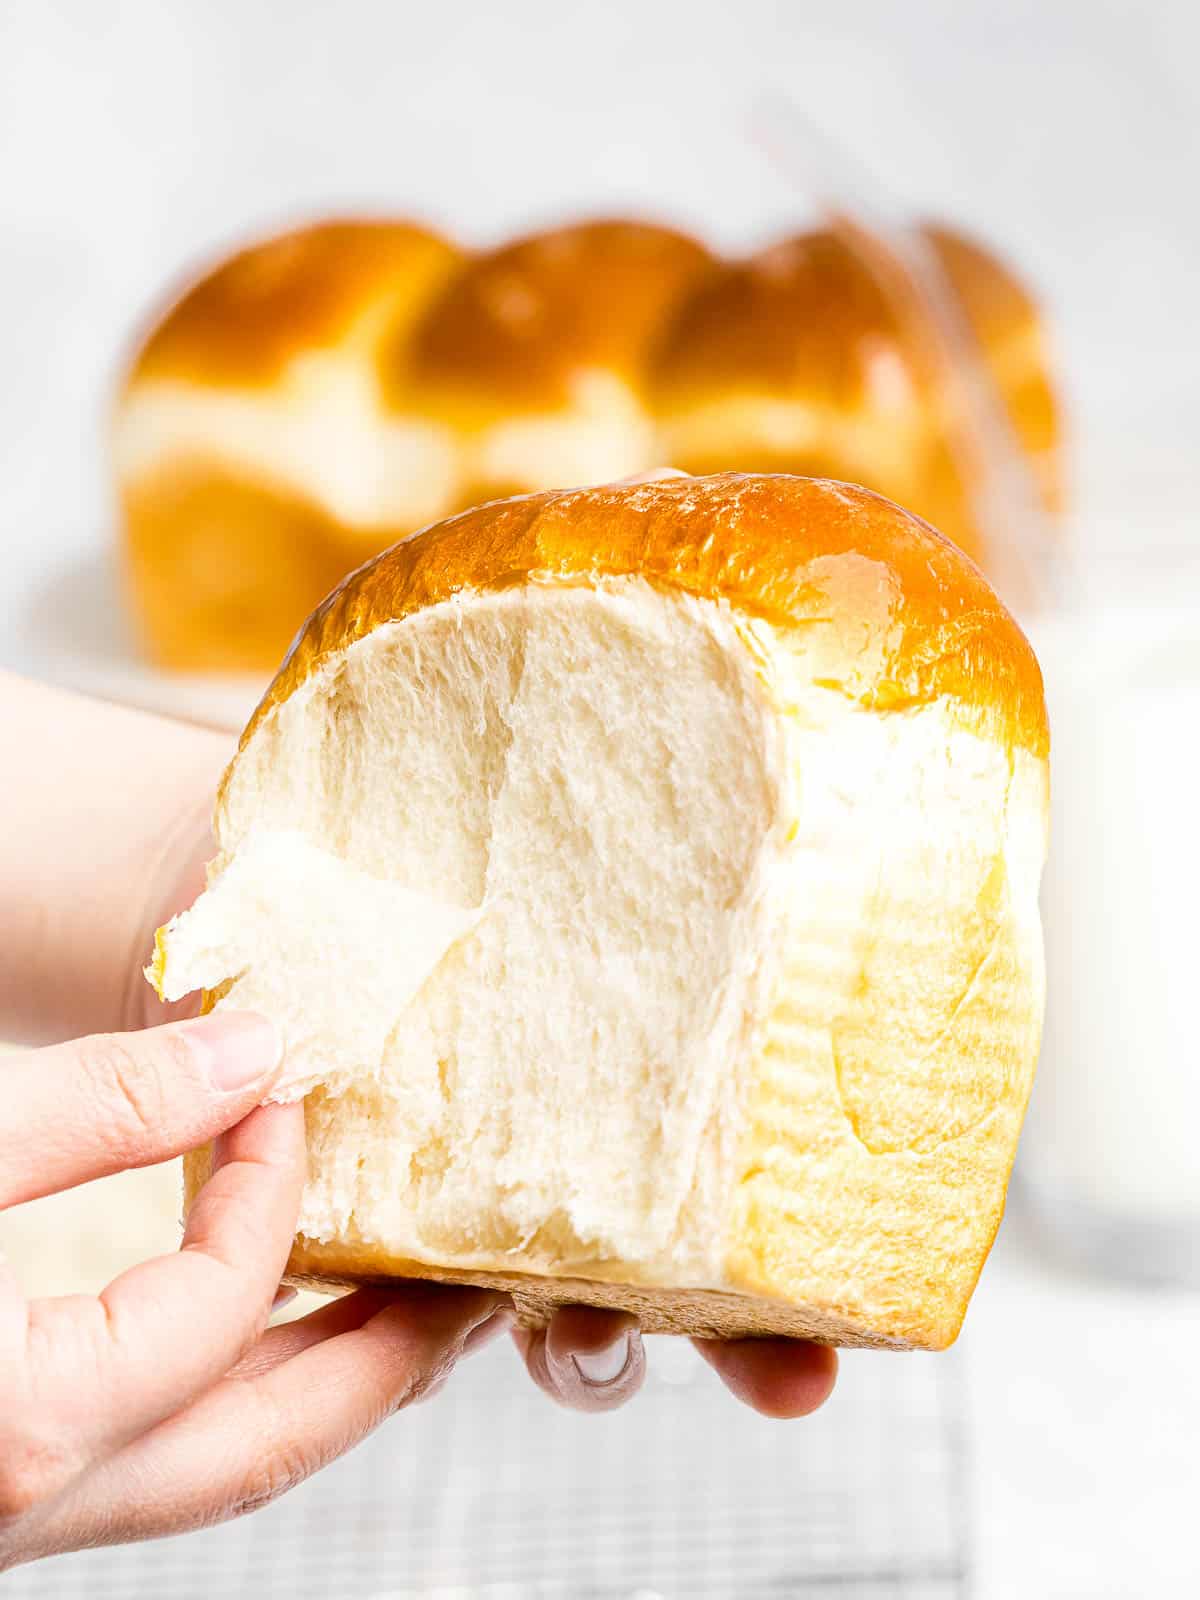
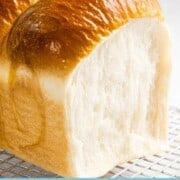
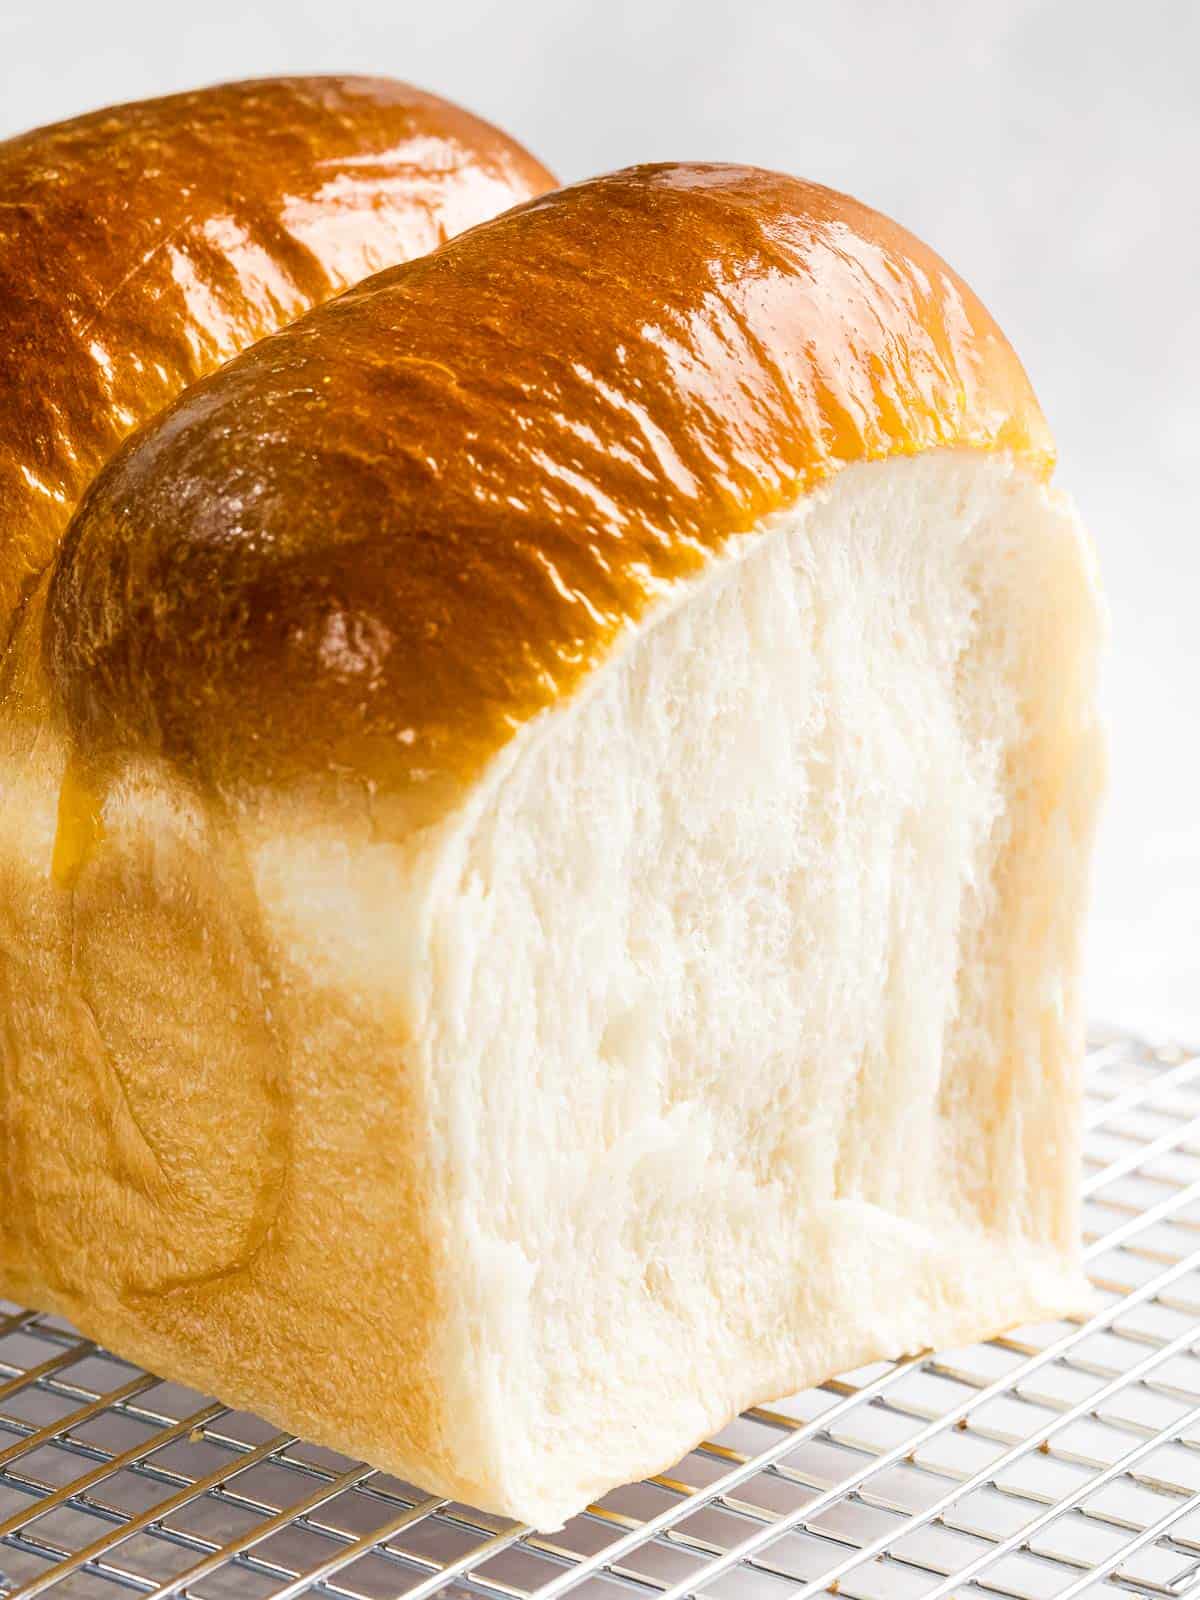
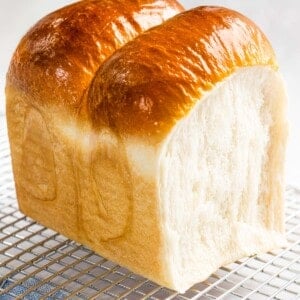
A sign of perfectly baked milk bread is a soft, stretchy texture that easily pull apart with your hands as seen in the photo above. The crumb should be soft, fluffy, and delicate while showing proper gluten development. Continue reading for step by step photos and instructions for how to achieve this!
Ingredients
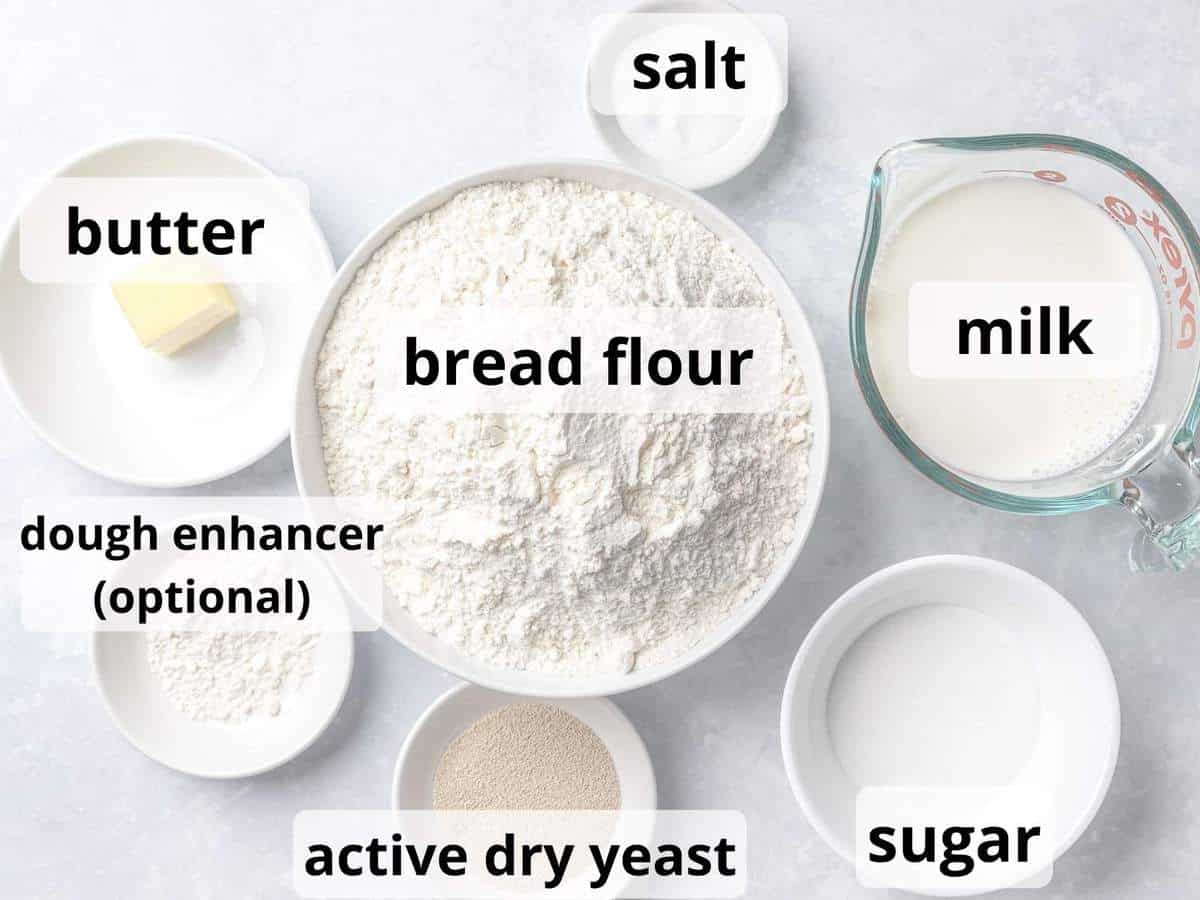
- Bread flour – Bread flour has higher protein content for more gluten development which is necessary for milk bread.
- Milk – I used 2% milk for this recipe but you can use non-fat or whole milk.
- Sugar & active dry yeast – The yeast feeds on the sugar to release carbon dioxide which proofs the bread.
- Dough enhancer – Highly recommended for the softest, fluffiest milk bread. It also keeps bread fresh for days.
How to make Japanese milk bread (shokupan)
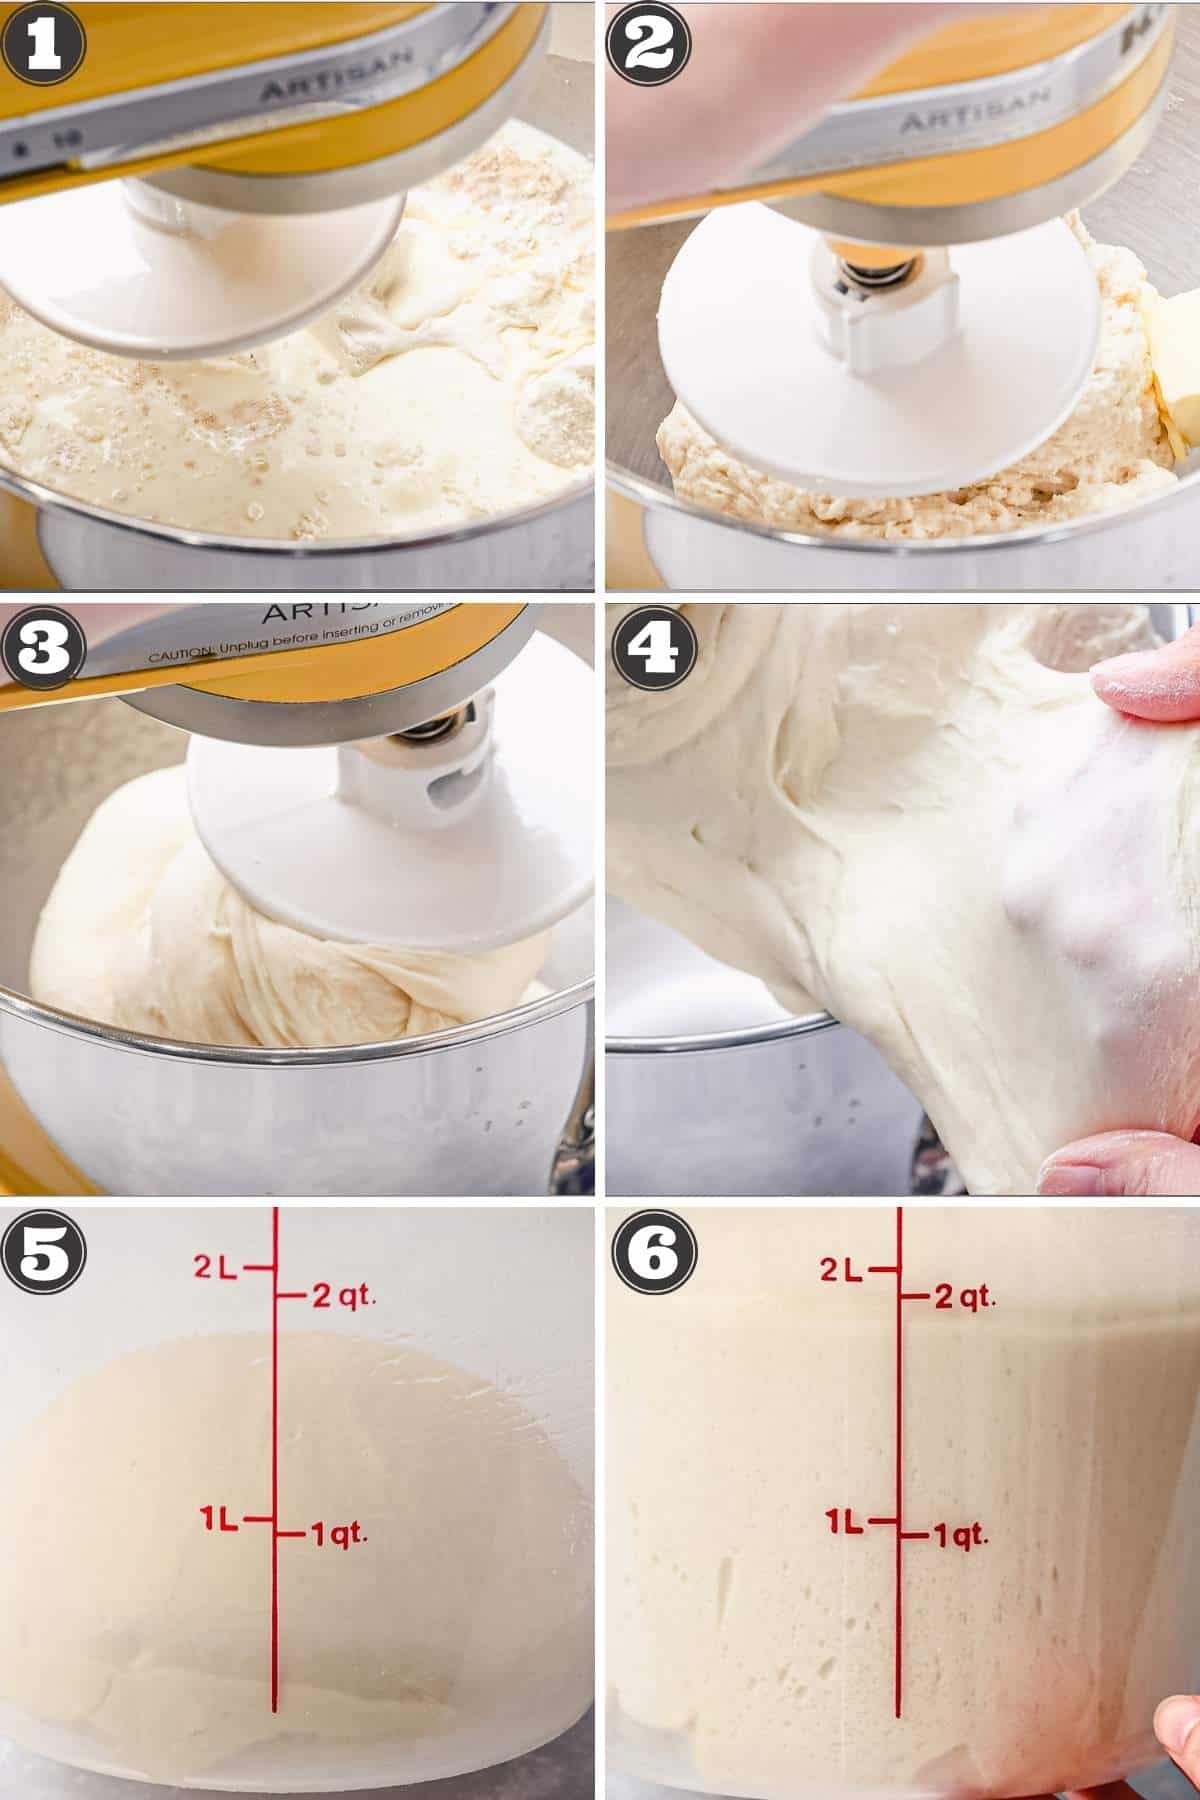
Make the dough
- Add all the ingredients except the butter in a stand mixer.
- Once the dry flour is incorporated fully, add the butter and mix on high.
- Once you get a smooth, round ball in the mixer check for proper gluten development. For me, it took 10 to 13 minutes but timing will vary depending on your mixer.
- Take a small piece of dough and stretch it between your fingers. If you can stretch it thin enough to see your fingerprint without it tearing, it’s ready. This is called the ‘windowpane test’.
- Form the dough into a loose ball and place it in a proofing container greased with oil.
- Place in a warm, humid place away from sunlight until it doubles in size.
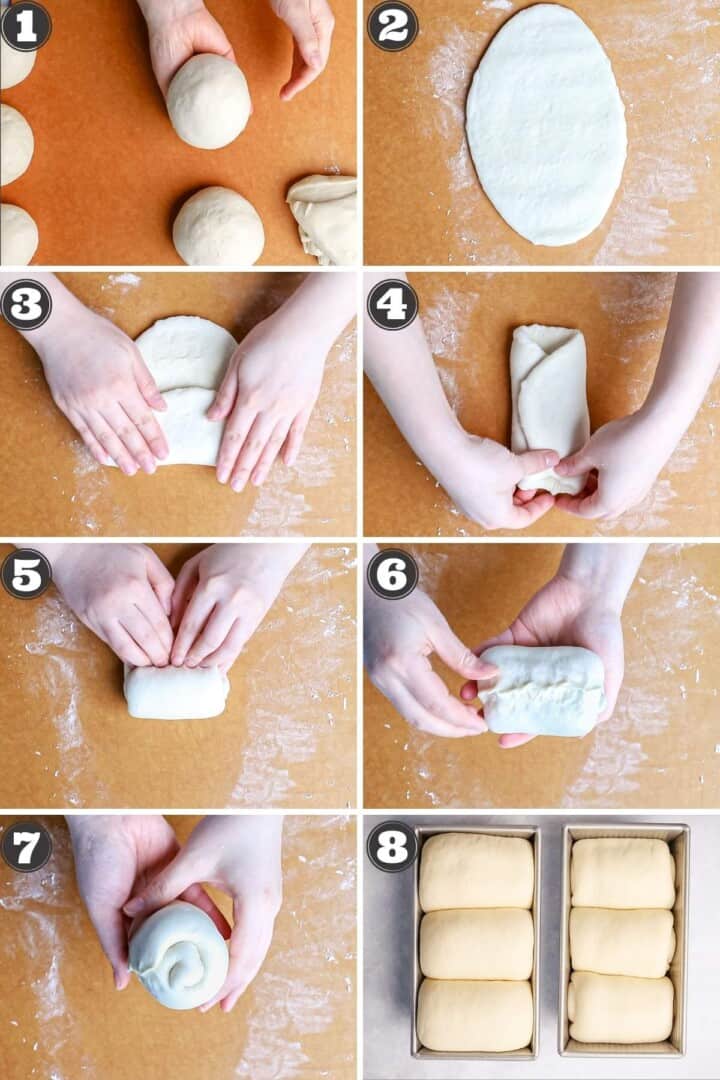
Shape and form the dough
- Divide the dough into 6 equal parts and form into a ball. Let it rest for 15 minutes loosely covered.
- Roll out the dough into an oval shape. Flip it over so the surface (crust) is on the bottom.
- Letter fold: Fold the top and bottom third over the center.
- Rotate 90° and roll it up to form a spiral while pressing down.
- Pinch the seam closed and add three pieces seam side down into a loaf pan.
- Proof in a warm, humid place until it doubles in size or it’s 1cm below the rim of the loaf pan.

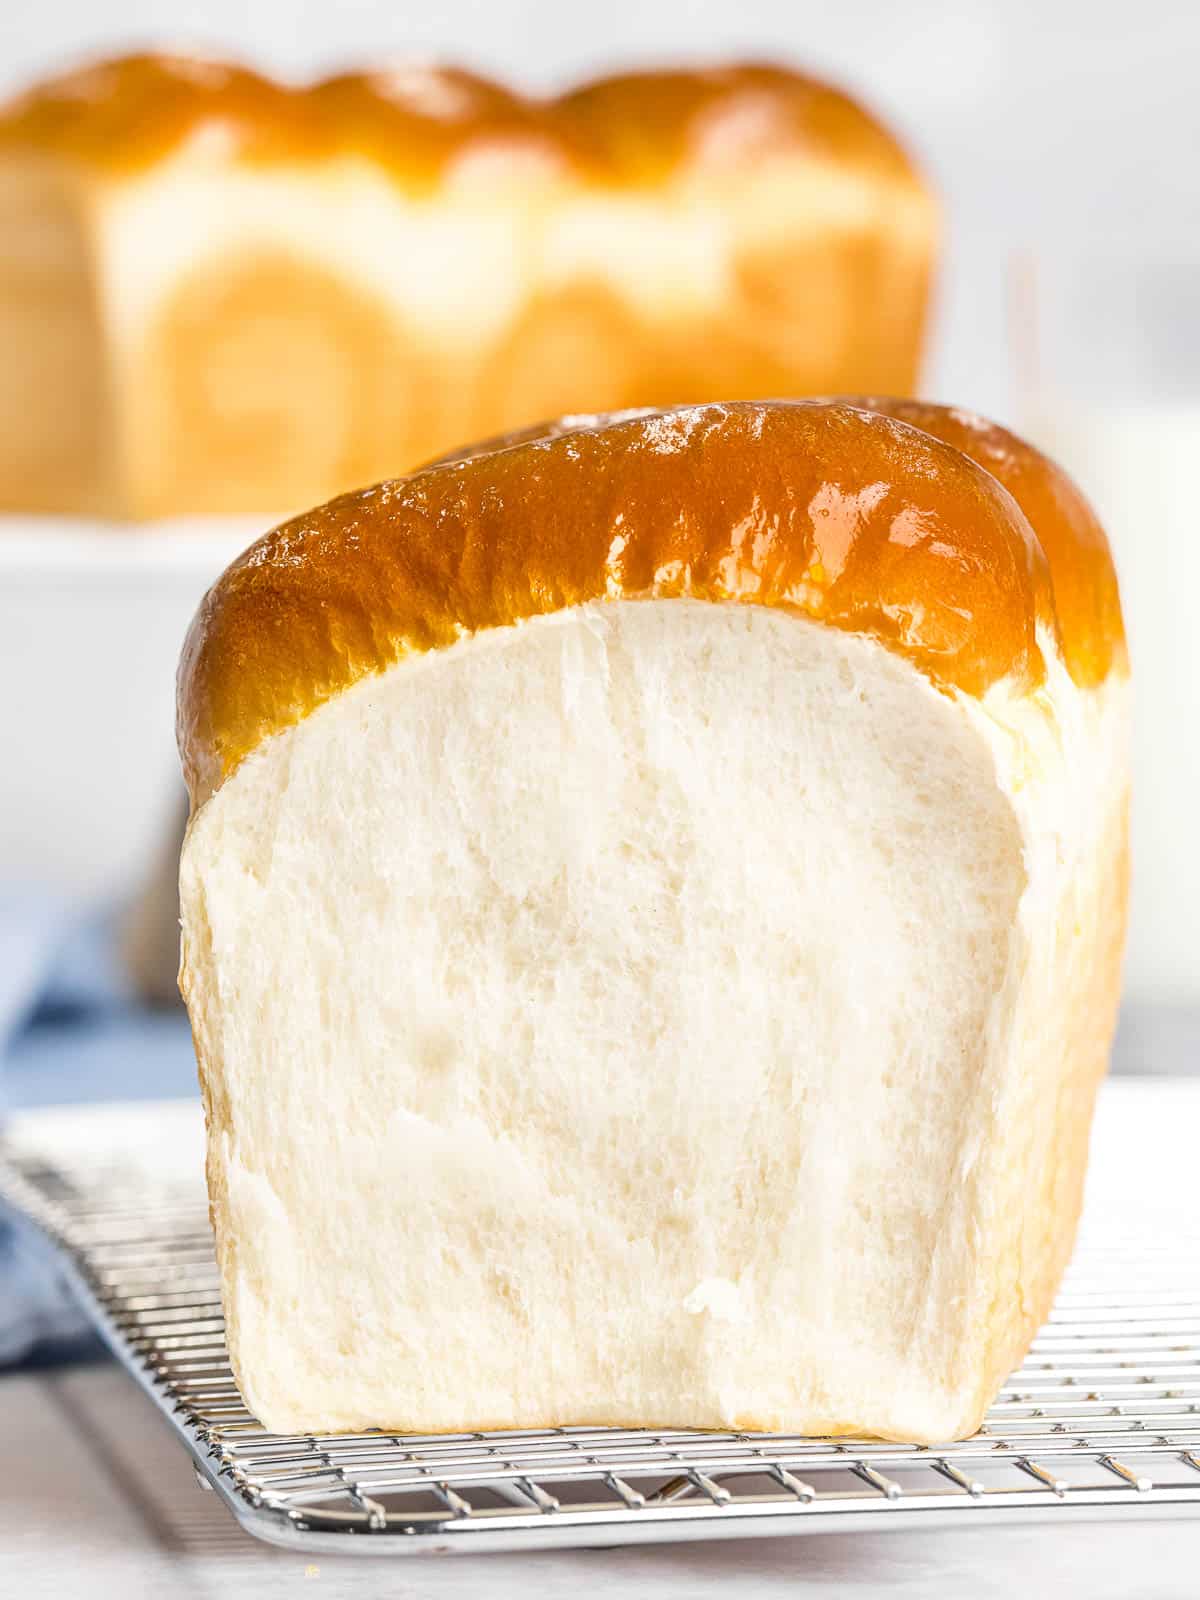
Bake and enjoy!
- Bake at 356° for 25 minutes or until there’s a golden brown crust.
- Immediately apply a thin layer of egg wash. To do this, crack an egg in a small bowl and mix together. Using a pastry brush, brush on a thin layer of the egg mixture. The heat from the bread will cook the egg, giving you a shiny golden crust.
- Remove the loaves from the pan and allow to cool on a cooling rack. Enjoy!
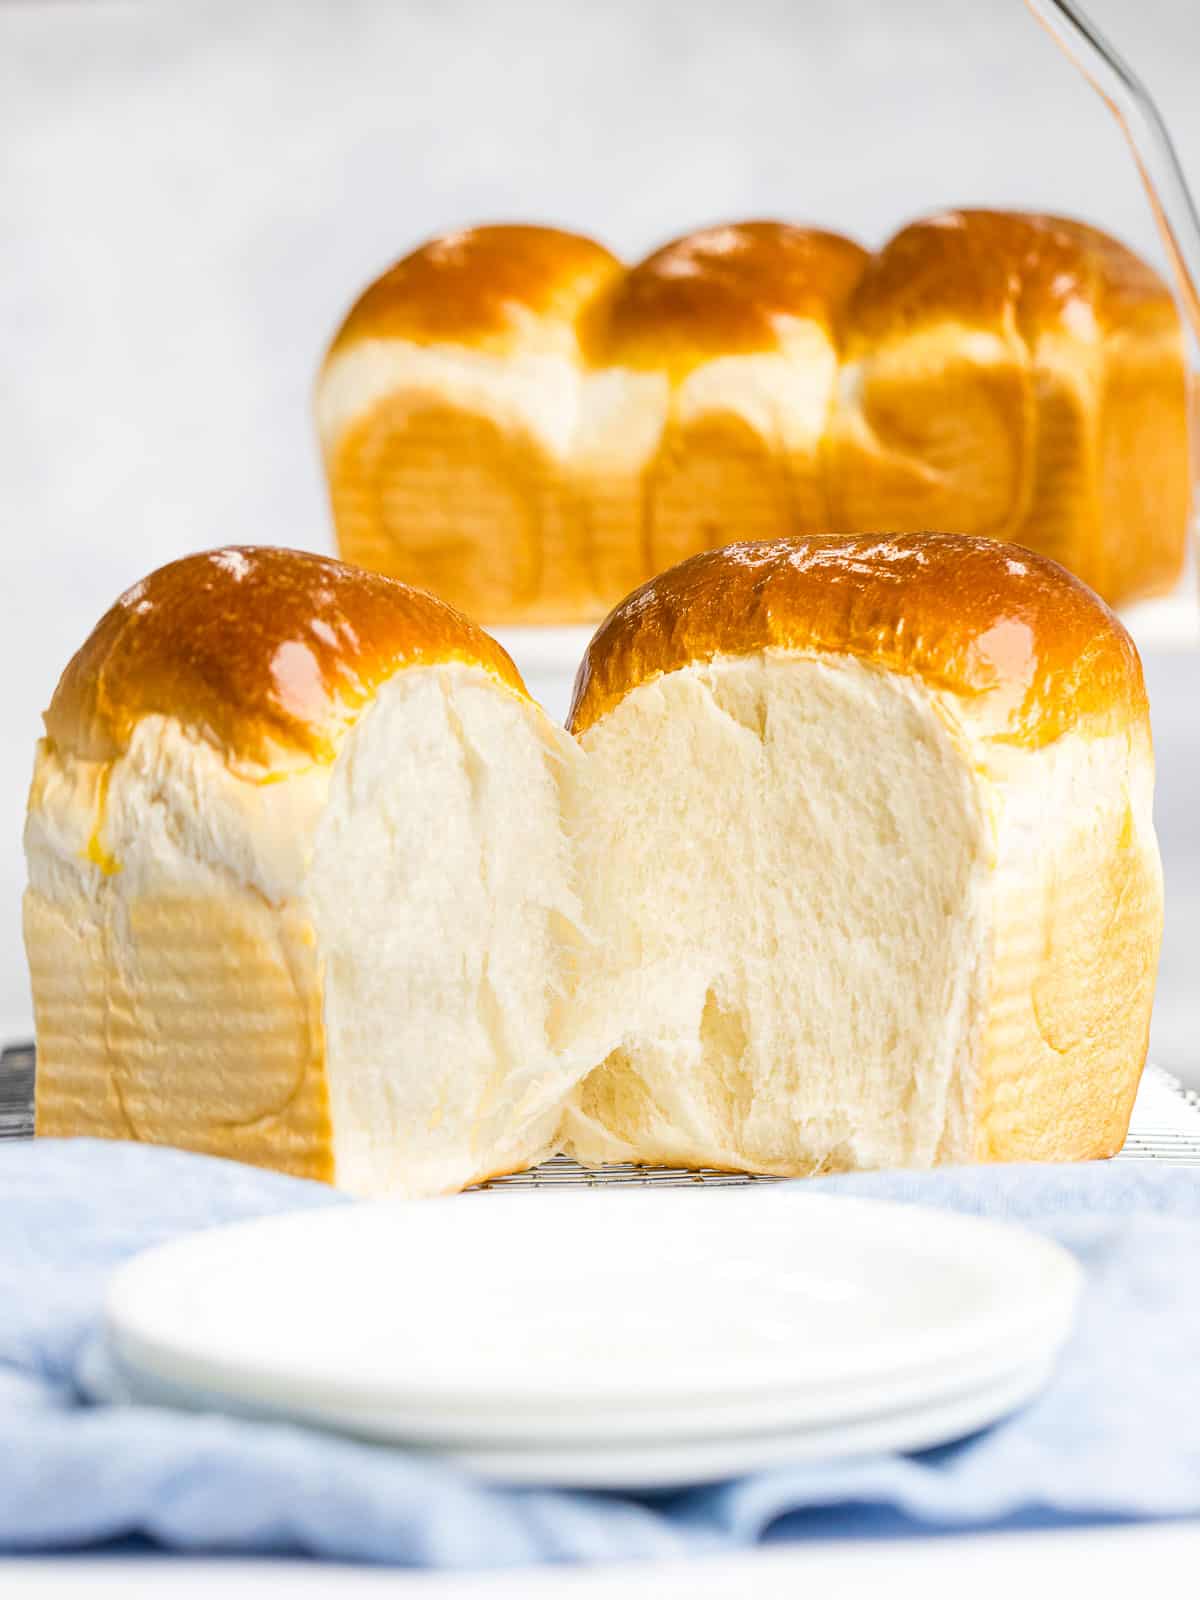
Properly made milk bread should pull apart easily to reveal a soft, light, fluffy interior. The crumb should look smooth without irregularity and should pull apart in stretchy ‘strips’, which shows proper gluten development and shaping.
Recipe tips
- The dough should pass the windowpane test for proper gluten development.
- Use dough enhancer for soft, fluffy bread with consistent results every time.
- Be gentle when handling the dough and be sure not to tear it during shaping. Tearing the dough will result in an irregular crumb without enough oven spring.
- Don’t rush the proofing process, make sure the dough doubles in size.
- Tightly form the spirals to achieve proper oven spring during the bake.
FAQ
This bread is made of milk, bread flour, sugar, butter, and yeast. It’s called milk bread because milk is the only wet ingredient added to this bread.
Brioche has a much higher ratio of butter to flour versus milk bread. Brioche also contains eggs which give it a richer taste compared to milk bread.
I hope you enjoy this recipe! Please share, rate, or comment below. I’d love to hear from you!
Come find me on Facebook, Pinterest, and Instagram! Share your recipes by tagging @drivemehungry. I love seeing your creations!
Thanks so much for stopping by! ? -Jamie
More recipes:
Sourdough Recipes
Soft Pumpkin Sourdough Bread
Desserts
Bakery Swiss Roll Cake Recipe
Desserts
Light and Fluffy Chiffon Cake
Soft and Fluffy Japanese Milk Bread
Equipment
Ingredients
- 4¾ cups bread flour
- 1¾ cups milk
- 2¼ Tablespoons sugar
- 1⅔ Tablespoons butter
- 2 teaspoons sea salt
- 3⅓ teaspoon active dry yeast
- 2¼ teaspoon dough enhancer, (optional) see Note 1
Instructions
- Mix: Attach the dough hook to your stand mixer. Add all the ingredients except the butter. Mix on low until there's no more dry flour. Then add the butter and beat on high speed. The dough is ready when it forms into a ball and the surface is smooth and glossy. Check for proper gluten develop using the window pane test (See Note 2). Timing will vary but it took me 10 to 13 minutes.4¾ cups bread flour, 1¾ cups milk, 2¼ Tablespoons sugar, 2 teaspoons sea salt, 3⅓ teaspoon active dry yeast, 2¼ teaspoon dough enhancer, 1⅔ Tablespoons butter

- Proof: Form the dough into a smooth round ball and place into a see through proofing container that's been coated with oil. Proof until doubled in size in a warm, humid environment. See Note 3.

- Bench rest: On a well floured surface, divide the dough into 6 even pieces and roll each into a ball. Loosely cover and let it rest for 15 minutes.

- Shape: Roll each ball into an oval shape. Flip it over so the surface (crust) is on the bottom and do a letter fold (2 folds). Then roll it up to form a spiral and then pinch the seam closed. Place three spirals in each 1 lb loaf pan. Repeat for the other pieces (See step by step photos in recipe post above).

- Final proof: Proof in a warm humid place until doubled in size or it's 1 cm below the rim of the loaf pan. Preheat your oven to 356° F.

- Bake: Bake at 356° F for 25 minutes or until it gets a golden brown crust. For a shiny, golden crust: Immediately after removing from the oven, brush on an egg wash coating for a shiny crust. Crack an egg in a small bowl and mix well. Using a pastry brush, apply a thin coating to the crust. The heat from the bread will cook the egg, giving you a shiny golden crust.

Notes
- Dough enhancer – Though optional, I highly recommend using this for the softest, fluffiest bread. It’s used by professional bakers to achieve that soft, light, and fluffy texture. It’s similar to using Tangzhong or yu-dane, but has better consistency with professional results. Carefully follow the instructions that come with the packet as they can vary. The recipe amount is based off of the brand I used which is 1% of the total weight of the bread flour.
- Window pane test – Sprinkle a small amount of flour onto the dough. Grab a small piece of dough and stretch it between your fingers. It should be translucent enough to see your fingers through it.
- Proofing environment – If you don’t have a proofer, you can leave the dough covered in a warm, humid place out of direct sunlight. Some suggestions:
- Use an oven: Place the dough on the top rack of your oven and an empty pan on the bottom rack. Pour boiling water halfway up the pan on the bottom rack and keep the oven door closed. This will create enough heat and humidity to proof the dough. You can also leave the oven light on if you need more heat.
- Use an insulated cooler or icebox: Add about 1 or 2 inches of hot water to an insulated cooler. Place the dough inside the cooler but make sure it’s not submerged in water by propping it on top of another container or board. This will create a warm, moist environment similar to a proofer. This is my preferred way to proof bread at home.
Nutrition
Nutrition information is automatically calculated, so should only be used as an approximation.
Like this? Leave a comment below!
I didn’t have dough enhancer but I think it still turned out absolutely amazing. The taste was great and it was so light and fluffy.
This really was the fluffiest, pillowy soft bread! We all loved it and will definitely be making it again soon.
This bread is the best! It’s so perfectly soft and fluffy, and the dough was really easy to handle. Love it!
Your soft fluffy milk bread recipe was a hit! That irresistible aroma and the way it practically melts in your mouth – it was perfect for some epic French toast with a drizzle of maple syrup for a lazy Sunday brunch. ????
This bread is so soft, fluffy, and delicious! Love how simple it is to make and it came out perfectly.
My go to bread recipe to impress my family.
A little home made butter or mayonnaise…
Chef’s kiss
Absolutely loved these…soft and delicious…easy recipe to follow
Am I able to use this dough to make other things, like cinnamon rolls?
would I still fold it the same way if I want square bread? and if so what pan should I use to get it square for sandwiches?
I made this and it was easy and stayed soft, fresh and fluffy fir days!
My homemade bread was only ever gooey the first day before.
I am going to try rolls and other breads with add ins and see how it goes. Perfect recipe!
I love this recipe so much! I’ve made it at least 5 times now! I have a question, do you have to activate the yeast before you put it in or does it just go in? Thank you!
Just made it…. AMAZING. we all love the fluffy yummy bread
followed the steps and honestly i’m obsessed with this recipe, this is the first bread i’ve made that turned out in general. i didn’t have any issues and it’s got a slight sweetness it tastes fantastic! overall wish i could give this recipe 100 stars. i recommend this recipe to anyone you don’t need much experience to make this bread at all.
Question – about how long does it take for the dough to double in size if you use the methods you mention? I’m trying to figure out if I can do this recipe in 3 hours total. Your 1.5 hours total time includes the dough rising, or not?
Hi. I was wondering if I could use almond milk instead of regular milk. Thank you
I have made this and it is amazing. So soft and easy to make. I am attempting to make and freeze. Has anyone done this yet and has it turned out.
Used all purpose flour since I didn’t have bread flour, turned out lovely.
My only advice is DONT STINGE ON THE SEA SALT!!!!! Also, proofing times add up to an hour and a half. 60 for the first proof and 30 for the second (this was in an oven using the hot water method as noted). This is very good with butter ?
Enjoy xoxo
My go to recipe!
Absolutely delicious!
This recipe came out so good!! I don’t have any of the gizmos like a mixer or proofer so I did those steps manually but the bread came out so soft and fluffy. It really is a duplicate of the breads you see in Asian bakeries like 85 degrees. This is my go-to milk bread recipe. Thank you!