
As an Amazon Associate I earn from qualifying purchases. This post may contain affiliate links.
Golden, thin, crispy mochi bites with a soft, chewy center make an excellent snack or treat! They’re egg-free, dairy-free, and baked in a mini muffin pan for the perfect bite-sized snack!
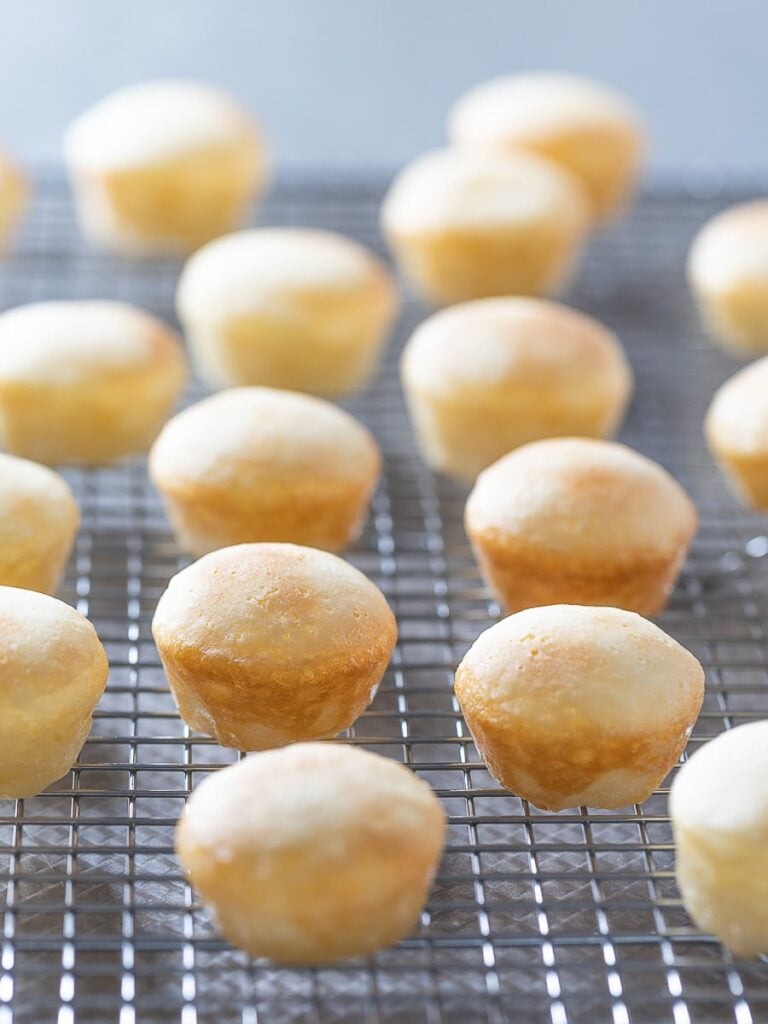
Mochi desserts were a constant in my childhood, so experimenting with sweet rice flour to create new desserts like these mochi bites became a fun pursuit. When I developed this recipe in 2019, my motivation was to create a lighter version of my Chewy Butter Mochi. I wanted something still chewy and sweet, but not as rich. I cut out the butter and egg and switched to light coconut milk. It stayed just as chewy and developed a thinner, crispier crust, which turned out to be a nice bonus.
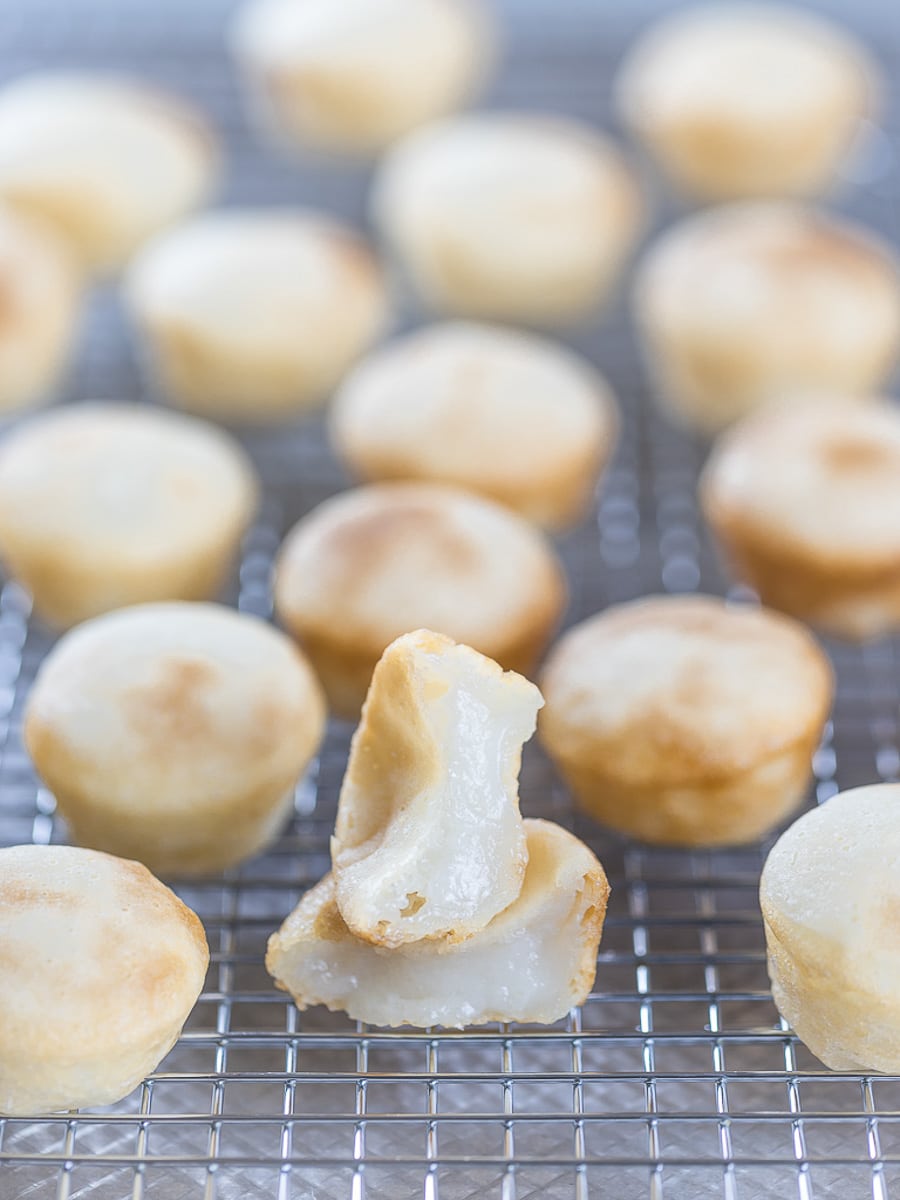
The inside is the best part. It’s soft and chewy, lightly sweet, with a subtle coconut flavor. I make these all the time to bring to parties and picnics because they travel well and you can bake them the day before. I recently brought a batch to my friend’s son’s birthday party, and they were gone in no time.

Mochi Bites Recipe Testing Notes
- Coconut milk: I tested both full-fat and light coconut milk (one full 400 ml can) and prefer light coconut milk for its delicate flavor, but full-fat works well if you want richer results. Expect a thicker batter, though.
- Baking powder: I used double-acting baking powder, which gives it a nice dome shape.
- Pan and fill: Greasing the mini muffin pan made it significantly easier to remove from the mochi bites. Filling the pan three-quarters full allowed for perfectly sized mochi bites without overflowing the pan.
- Bake: 350°F for about 45 minutes gave me golden-brown crusts. Lowering the temperature resulted in flatter results with less color.
- Cooling matters: The mochi bites firm up and turn chewy as they cool, so let them cool completely before eating.
- Crust texture: The crust softens if the mochi bites sit at room temperature for a few hours after baking. In my kitchen, humidity usually softens them enough that I re-toast them to crisp the outside again.
- Yield: During testing, one batch made about 48 mochi bites using a mini muffin pan with 2 rounds of baking.
What Is Sweet Glutinous Rice Flour?
Sweet glutinous rice flour is flour milled from short-grain glutinous rice, also called sweet rice or sticky rice. You’ll find it labeled as sweet rice flour, glutinous rice flour, or Mochiko, the brand I use for this recipe.
It’s not sweet, and it doesn’t contain gluten. Both parts of the name are misleading. “Glutinous” describes how sticky the rice gets, not gluten. “Sweet” is just part of the name: the flour itself has a mild, neutral flavor.
Ingredient Notes
- Sweet glutinous rice flour: Sweet glutinous rice flour, sometimes sold as glutinous rice flour, gives these bites their stretch and chew. Don’t swap in regular rice flour, you won’t get the same results.
- Sugar: Sweetens the batter just enough. Think Asian dessert level sweetness.
- Light coconut milk: One 400 ml can, shaken well before opening, using both the liquid and the cream.
- Baking powder: Double-acting to add volume.
- Cooking spray: For greasing the pan.

How to Make Vegan Coconut Mochi Bites
1. Preheat and grease. Preheat the oven to 350°F. Grease a mini muffin pan with cooking spray.
2. Mix the batter. Add the glutinous rice flour, sugar, coconut milk, water, vanilla, baking powder, and salt to a large bowl. Mix until completely smooth. Tip: Shake the can well before opening so the thick cream at the top and sides mixes in.
3. Fill the pan. Fill each mini muffin cup about three-quarters full.
4. Bake until golden. Bake for about 45 minutes, until the tops turn golden brown.
5. Cool completely. This is where the texture sets. The bites firm up and turn chewy as they cool. The center should be stretchy and chewy.

Storage
Let the mochi bites cool completely, then store them in an airtight container. If you seal them while they’re still warm, condensation can make them soggy.
They’re fine on the counter for a day. After that, keep them in the fridge for up to 3 or 4 days. To serve, pop them in a toaster oven until they’re slightly warm and soft again. This also re-crisps the outside if the crust has softened.
Variations and Substitutions
Brown sugar: Should work in place of granulated sugar.
Coconut topping: Sprinkle shredded coconut on top right before baking.
Frequently Asked Questions
No. You need sweet rice flour, also called glutinous rice flour, such as Mochiko. Regular rice flour is completely different and won’t give you the chewy texture.
Glutinous rice flour doesn’t contain gluten, despite the name. If you’re baking for someone with celiac disease, also check the labels on your baking powder and vanilla.
Yes, I tried both full-fat and light coconut milk. Full-fat coconut milk gave it a richer taste, which some readers loved. Full-fat makes a thicker batter, so check on them as they bake.
Check that your baking powder is fresh, since it loses strength with age, and check your oven temperature. Too much liquid or an oven running cool can also keep them flat. Try a little less coconut milk and a slightly higher temperature, and keep an eye on them.
I got 48 mochi bites using a mini muffin pan that holds 24 mini muffin molds. I needed to bake them in two rounds.

Vegan Coconut Mochi Bites
Equipment
Ingredients
- 2 cups sweet glutinous rice flour
- 1 cup sugar
- 1 can light coconut milk, 400ml
- ¼ cup water
- ½ teaspoon vanilla extract
- ⅓ teaspoon double-acting baking powder
- pinch of salt
- Cooking spray or non-dairy butter to grease your pan
Instructions
- Preheat the oven to 350°F. Grease a mini muffin pan with cooking spray or non-dairy butter.
- Add all the ingredients to a large bowl and mix until smooth. Tip: Shake the can of coconut milk well to mix together the liquid and cream that have separated.2 cups sweet glutinous rice flour, 1 cup sugar, 1 can light coconut milk, 1/4 cup water, 1/2 teaspoon vanilla extract, 1/3 teaspoon double-acting baking powder, pinch of salt
- Fill each cup about ¾ full. Bake for about 45 minutes, until golden brown. Bake in batches until you use all the batter. I baked 2 batches to make 48 mochi bites.
- Cool completely before serving. They will firm up and become chewy as they cool.
Notes
Nutrition
Nutrition information is automatically calculated, so should only be used as an approximation.
Like this? Leave a comment below!




I love this recipe! The original is super good but i’ve also played around with these five star variations:
-everything the same except a dollop of sweetened red bean paste in the middle
-replace water with coffee and white sugar with brown sugar. I made this in a tart pan and set aside some batter to mix cocoa powder in, which i marbled in on top. Tastes just like those brown sugar boba popsicles.
Works in different sized muffin tins and even in a cake tin.
Thanks!
Thanks Madi! These variations sound delicious especially the red bean paste! I’ll have to try that myself. 🙂
these are SO simple, and SO delicious.
I used a regular size muffin tray, used muffin liners, and added about 6 mins on to the baking time. This recipe is seriously a winner, I’ve made it about 5 times already, and plan to keep doing so. they freeze super well too.
Aww thank you so much Julia! I’m so happy to hear that. Thanks for sharing! 🙂
I used coconut cream and stirred in some vegan chocolate chips. My nephew has really bad food allergies to gluten, dairy, eggs, and a bunch of other stuff and not only was he just fine eating these, he loved them! After they cooled, they lasted about 10 minutes before they were all gobbled up by both kids and adults!
YUMMMMM.
I used a regular 6 pan muffin tin, halved the sugar and topped w sweetened sugar right before baking as Jamie suggested to another commenter. I baked for 50 mins. They’re dense chewy sweet and so so good. Thank u!
Oops I meant to say “topped w sweetened coconut flakes” lol
Thanks for sharing Alissa! I’m so happy you liked it! 🙂
These look great! With the canned coconut milk does it have to be liquid or can the coconut cream of the can be used?
Hi Emily! I used the entire can of coconut milk – the liquid and cream included. I shook the can before opening it to try to dislodge some of the cream from the top and sides of the can. I hope you like this recipe!
I like this recipe. It tastes good. However, the outside crust is pretty hard. Little hard to bite. But inside is good. I followed the same ingredients. It seems there is no egg & oil (except oil spray). Any suggestion to soften the crust?
Hi Wendy! Glad you liked the recipe. 🙂 The crust should soften up if you leave it at room temperature for a few hours after baking. You can also cover it slightly with foil to trap some of the steam. Usually the humidity from the kitchen works for me and I have to re-toast them to crisp them back up. Hope that helps!
The little mochi bites turned out beyond amazing! It was crunchy on the outside, and chewy on the inside. I greased the mini muffin pan with coconut oil, used full fat coconut milk, cut sugar to 1/4 c + half of a 1/4
cup, and sprinkled unsweetened coconut flakes on top. I also had some batter leftover and made some in a cupcake sized pan (added 10 mins extra to recipe time). This was a really delicious recipe. Cannot wait to try out your other recipes! Thank you so much!
Thanks Lena! So happy to hear you enjoyed this! Let me know if there’s other mochi recipes you’d like me to post! 🙂
Hi! Would it be possible to make this in normal sized muffin tins?
Hi Liz! Absolutely you can make this in normal sized muffin tins. You’ll have to bake it for longer until it becomes a golden brown color. I’ll update the recipe with the baking time once I try it out with normal sized muffin tins. 🙂
I made them in normal muffin-sized tins and I actually took them out a bit sooner (1-2 mins maybe), but that is because there was not enough batter to fill as high as 3/4 of the way up the tin, so they were thinner rounds.
Also used full-fat coconut and coconut sugar instead of cane sugar. Came out delicious nonetheless, though I wish I had maybe added something else for an additional flavor or garnish. Thanks!
Great to hear! Thanks for sharing your adjustments Noon! Some others have added shredded coconut to the top and seemed to enjoy it for additional flavor. 🙂
Could you please do a uk friendly recipe?
Thank you
These were delicious and easy to make! I added 1/2 a cup of finely shredded coconut and it completely changed the texture. They were delicious but more cakey. I will try again next time with no coconut shreds and 3/4 cups sugar as we found them a tad too sweet. Thank you for the great recipe.
Thank you and I’m so glad you liked it! If you’d like, you can sprinkle a bit of shredded coconut just on top right before baking so you still get the coconut flavor. 🙂
Would it alter the taste and texture too much if I used brown sugar instead of regular white granulated sugar, or perhaps even maple syrup? What does everyone think?
~R
P.S. Definitely using shredded coconut ? to enhance the flavor. Thank you, Jamie!
Hi Renata! I think substituting brown sugar would be fine for this recipe but I would hesitate to use maple syrup as it may add too much liquid to the batter but can’t say for sure since I never tried it with maple syrup. Shredded coconut’s a great addition to these mochi bites! Hope you enjoy!
i loooove this recipe its so easy to make and such a fun texture. i like to add shredded coconut to make the flavor stronger 🙂
Thank you Paulina! That’s a great idea adding shredded coconut to these. So glad you enjoyed it! 🙂
These are the best sweet treats when you need a little pick-me-up! They last for several days and have a delious coconut flavour. These and a cup of coffee – afternoon tea is sorted!
Thanks Emma! They do make great little snacks indeed! So happy you like them!